Recently, I have been kind of obsessed with arrows and chevrons. And you know what? I am not the only one! Everywhere you go, they are the new feature in a collage wall or a trendy decor shop. So naturally, I really wanted to get a couple to decorate my walls. The issue is that, lately, I’ve been having a big problem. Every time I go shopping, I’m unable to buy anything anymore because now I always say “I can do that myself!”.
So on my recent trip to my local craft store, I saw a gorgeous set of wood chevrons and I fell in love. I immediately took a picture in order to figure out how I would make some for my craft room. When I turned them around to see the price, I was slapped with the $49.99 sticker! Are you kidding me? So I decided that I needed to make a post about how to make them. Now you guys don’t have to go spending $50 on something that you can make yourselves with less than $10 worth of materials. So here it is!
On this post I will show you how to do my version of a couple of gorgeous chevrons that will be the feature of your gorgeous collage wall.
What do you need to buy?
1″ x 6″ x 6′ (for the chevrons)
Small box of Kreg 1-1/4″ Pocket Screws
Wood stain of your preference ( I used Minwax Wood Stain in Jacobean Color)
Command Picture Hanging Strips
What tools do you need to have?
Pocket Hole Jig (I have the Kreg Jig (K4 Jig) but you can do this with the Kreg R3 Jr ( K3 )
. that is less expensive)
Drill (I breathe for my Ryobi Cordless Drill, it is amazing AND affordable)
Miter Saw (I used my DEWALT 12-Inch Miter Saw, but you can totally do these 45° cuts with a 12″ Hand Saw and a Mitre Box
)
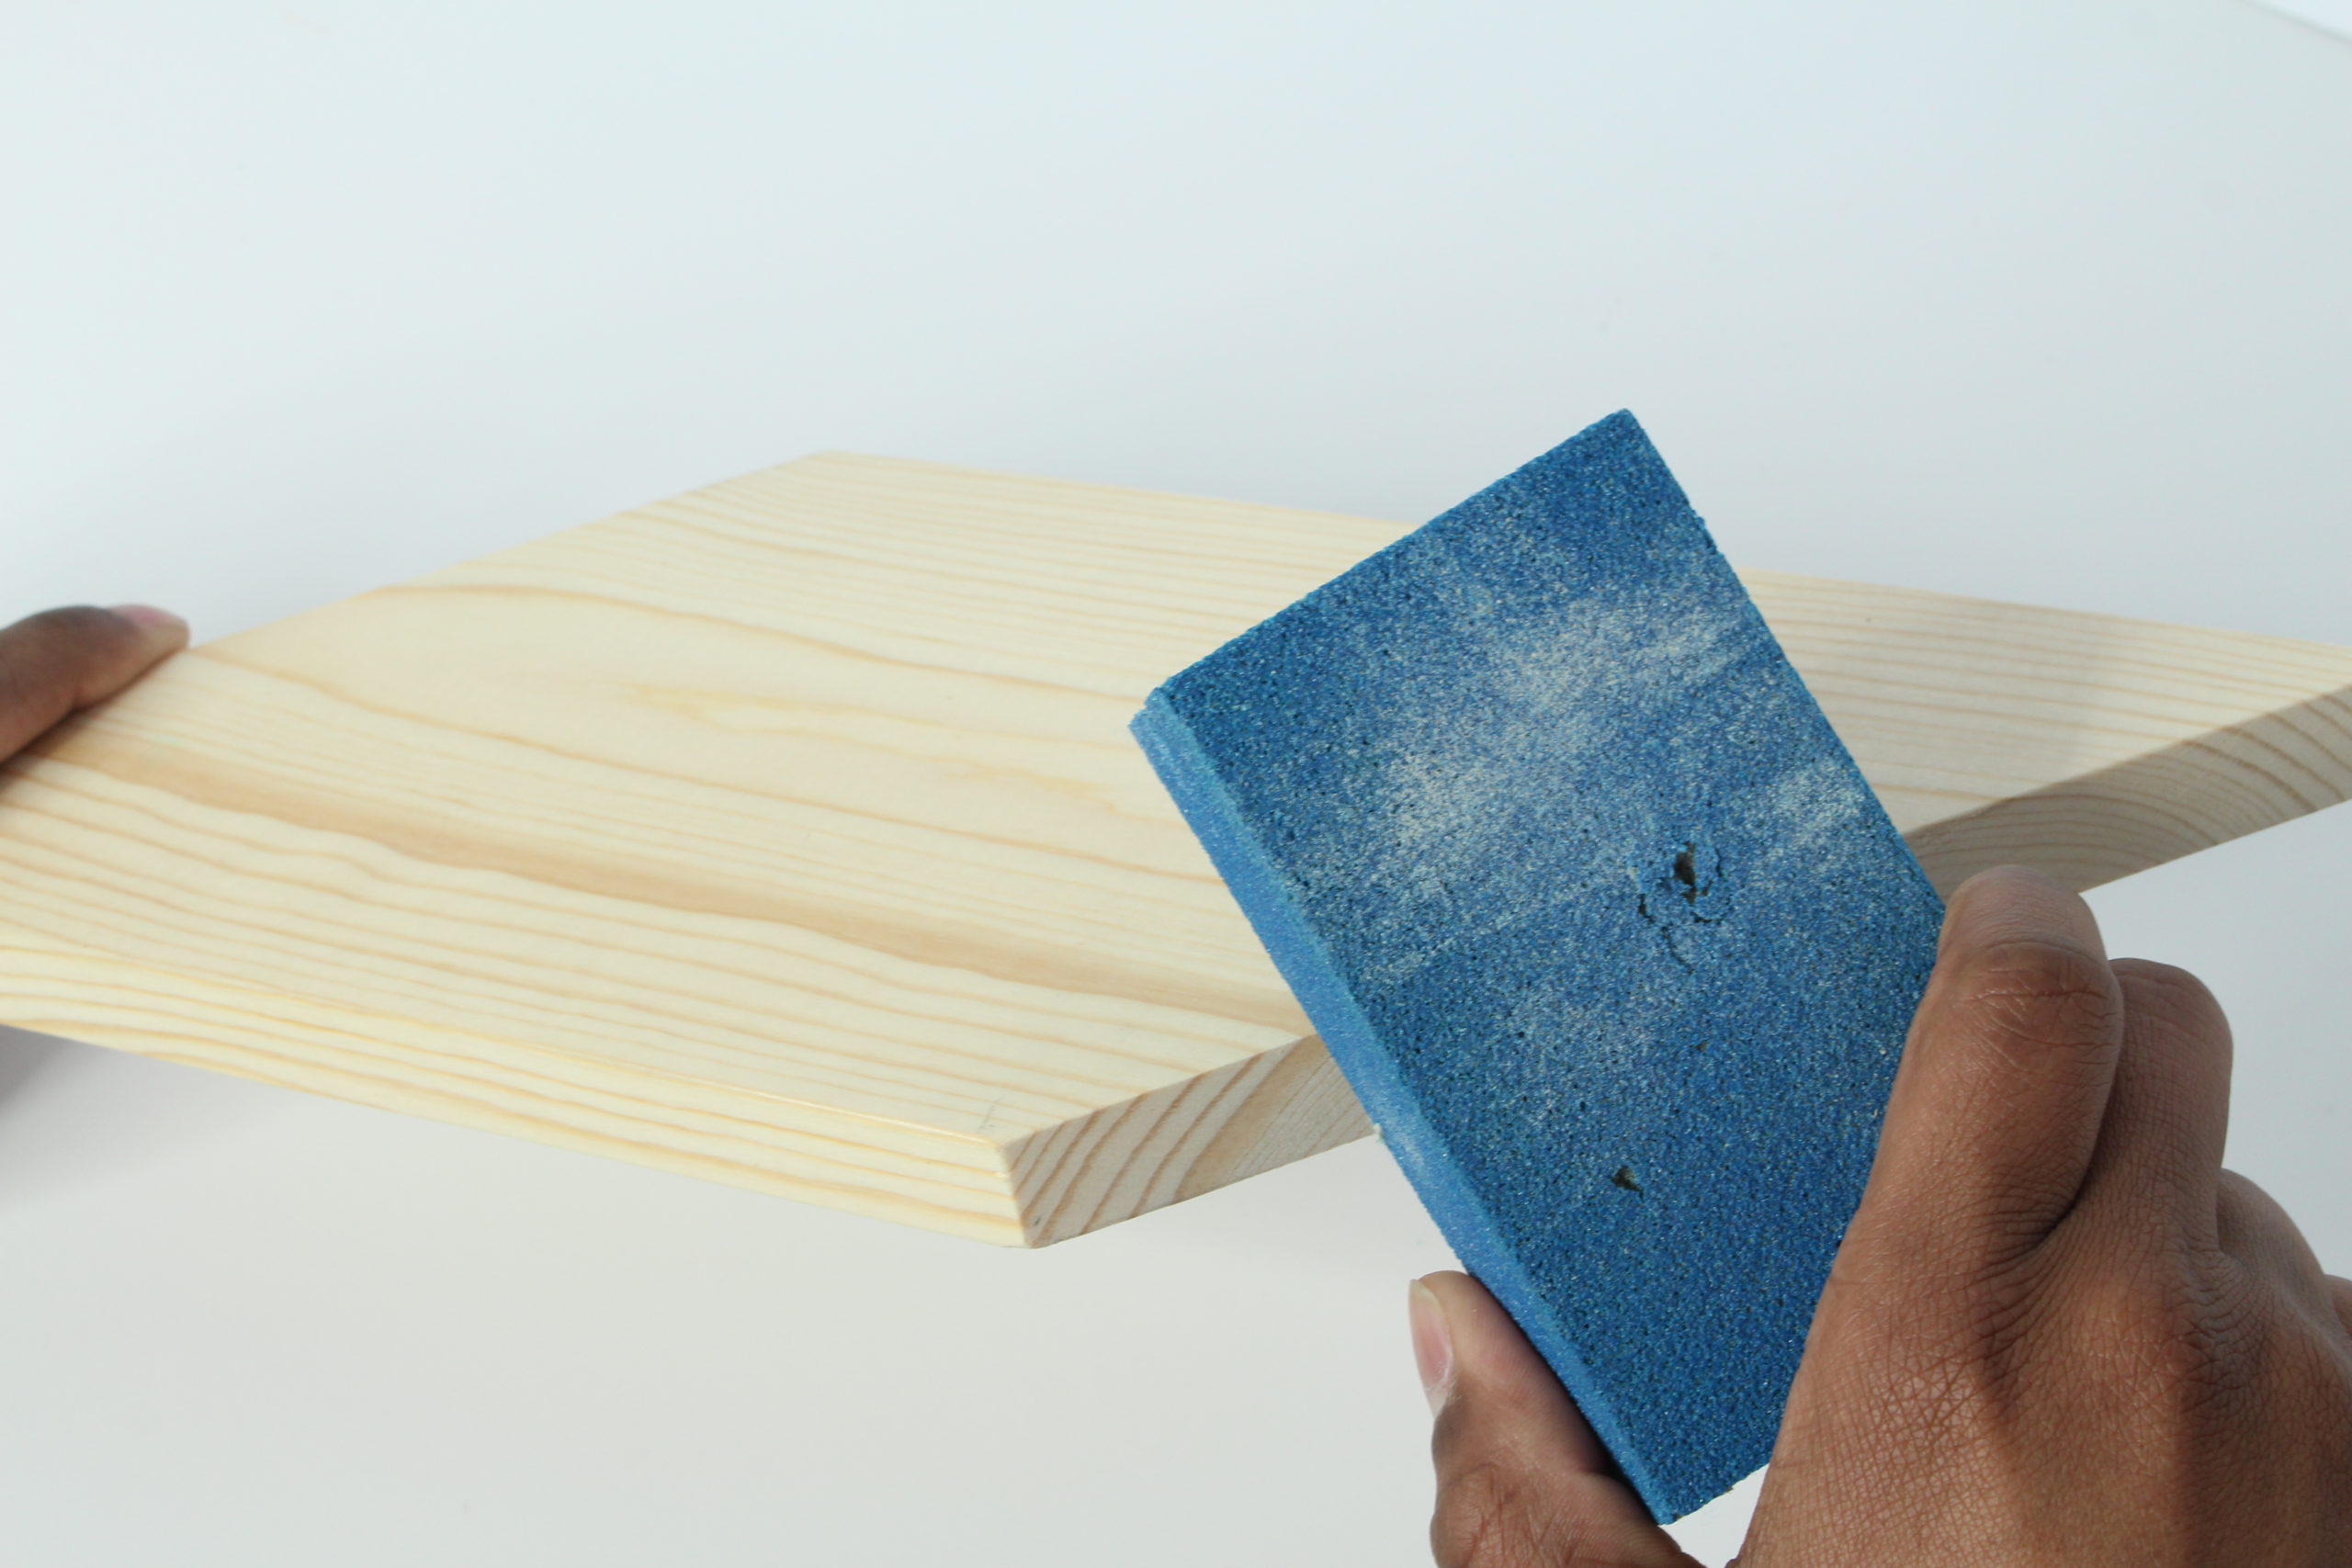
A Sanding Sponge to smooth out the rough cuts
How to do this project?
The first thing that I want to put out there is that the beauty of doing something yourself is that you can customize the measurements, colors and style to satisfy your needs and taste. So even though I will be sharing the measurements that I used, you can totally modify the dimensions and color of each piece. Have fun, create and then show me pictures of your masterpieces. 😉
Wood Chevrons
For the wood chevrons I made my 45° cuts for each segment with my miter saw at 9 1/2 inches. With a 6 feet board of 1″ x 6″ you can get up to 6 segments of 9 1/2″ that would make a set of 3 chevrons.
After you make all of your cuts, make sure to sand off the edges so there is nothing too sharp and is safe for handling.
Now choose your favorite stain color and give all of your segments a good coat of stain. I used Minwax Wood Stain in Jacobean color on all the pieces for this project. I let my projects dry over night because of the stain smell, but you will be safe if you just follow the instructions on the stain can.
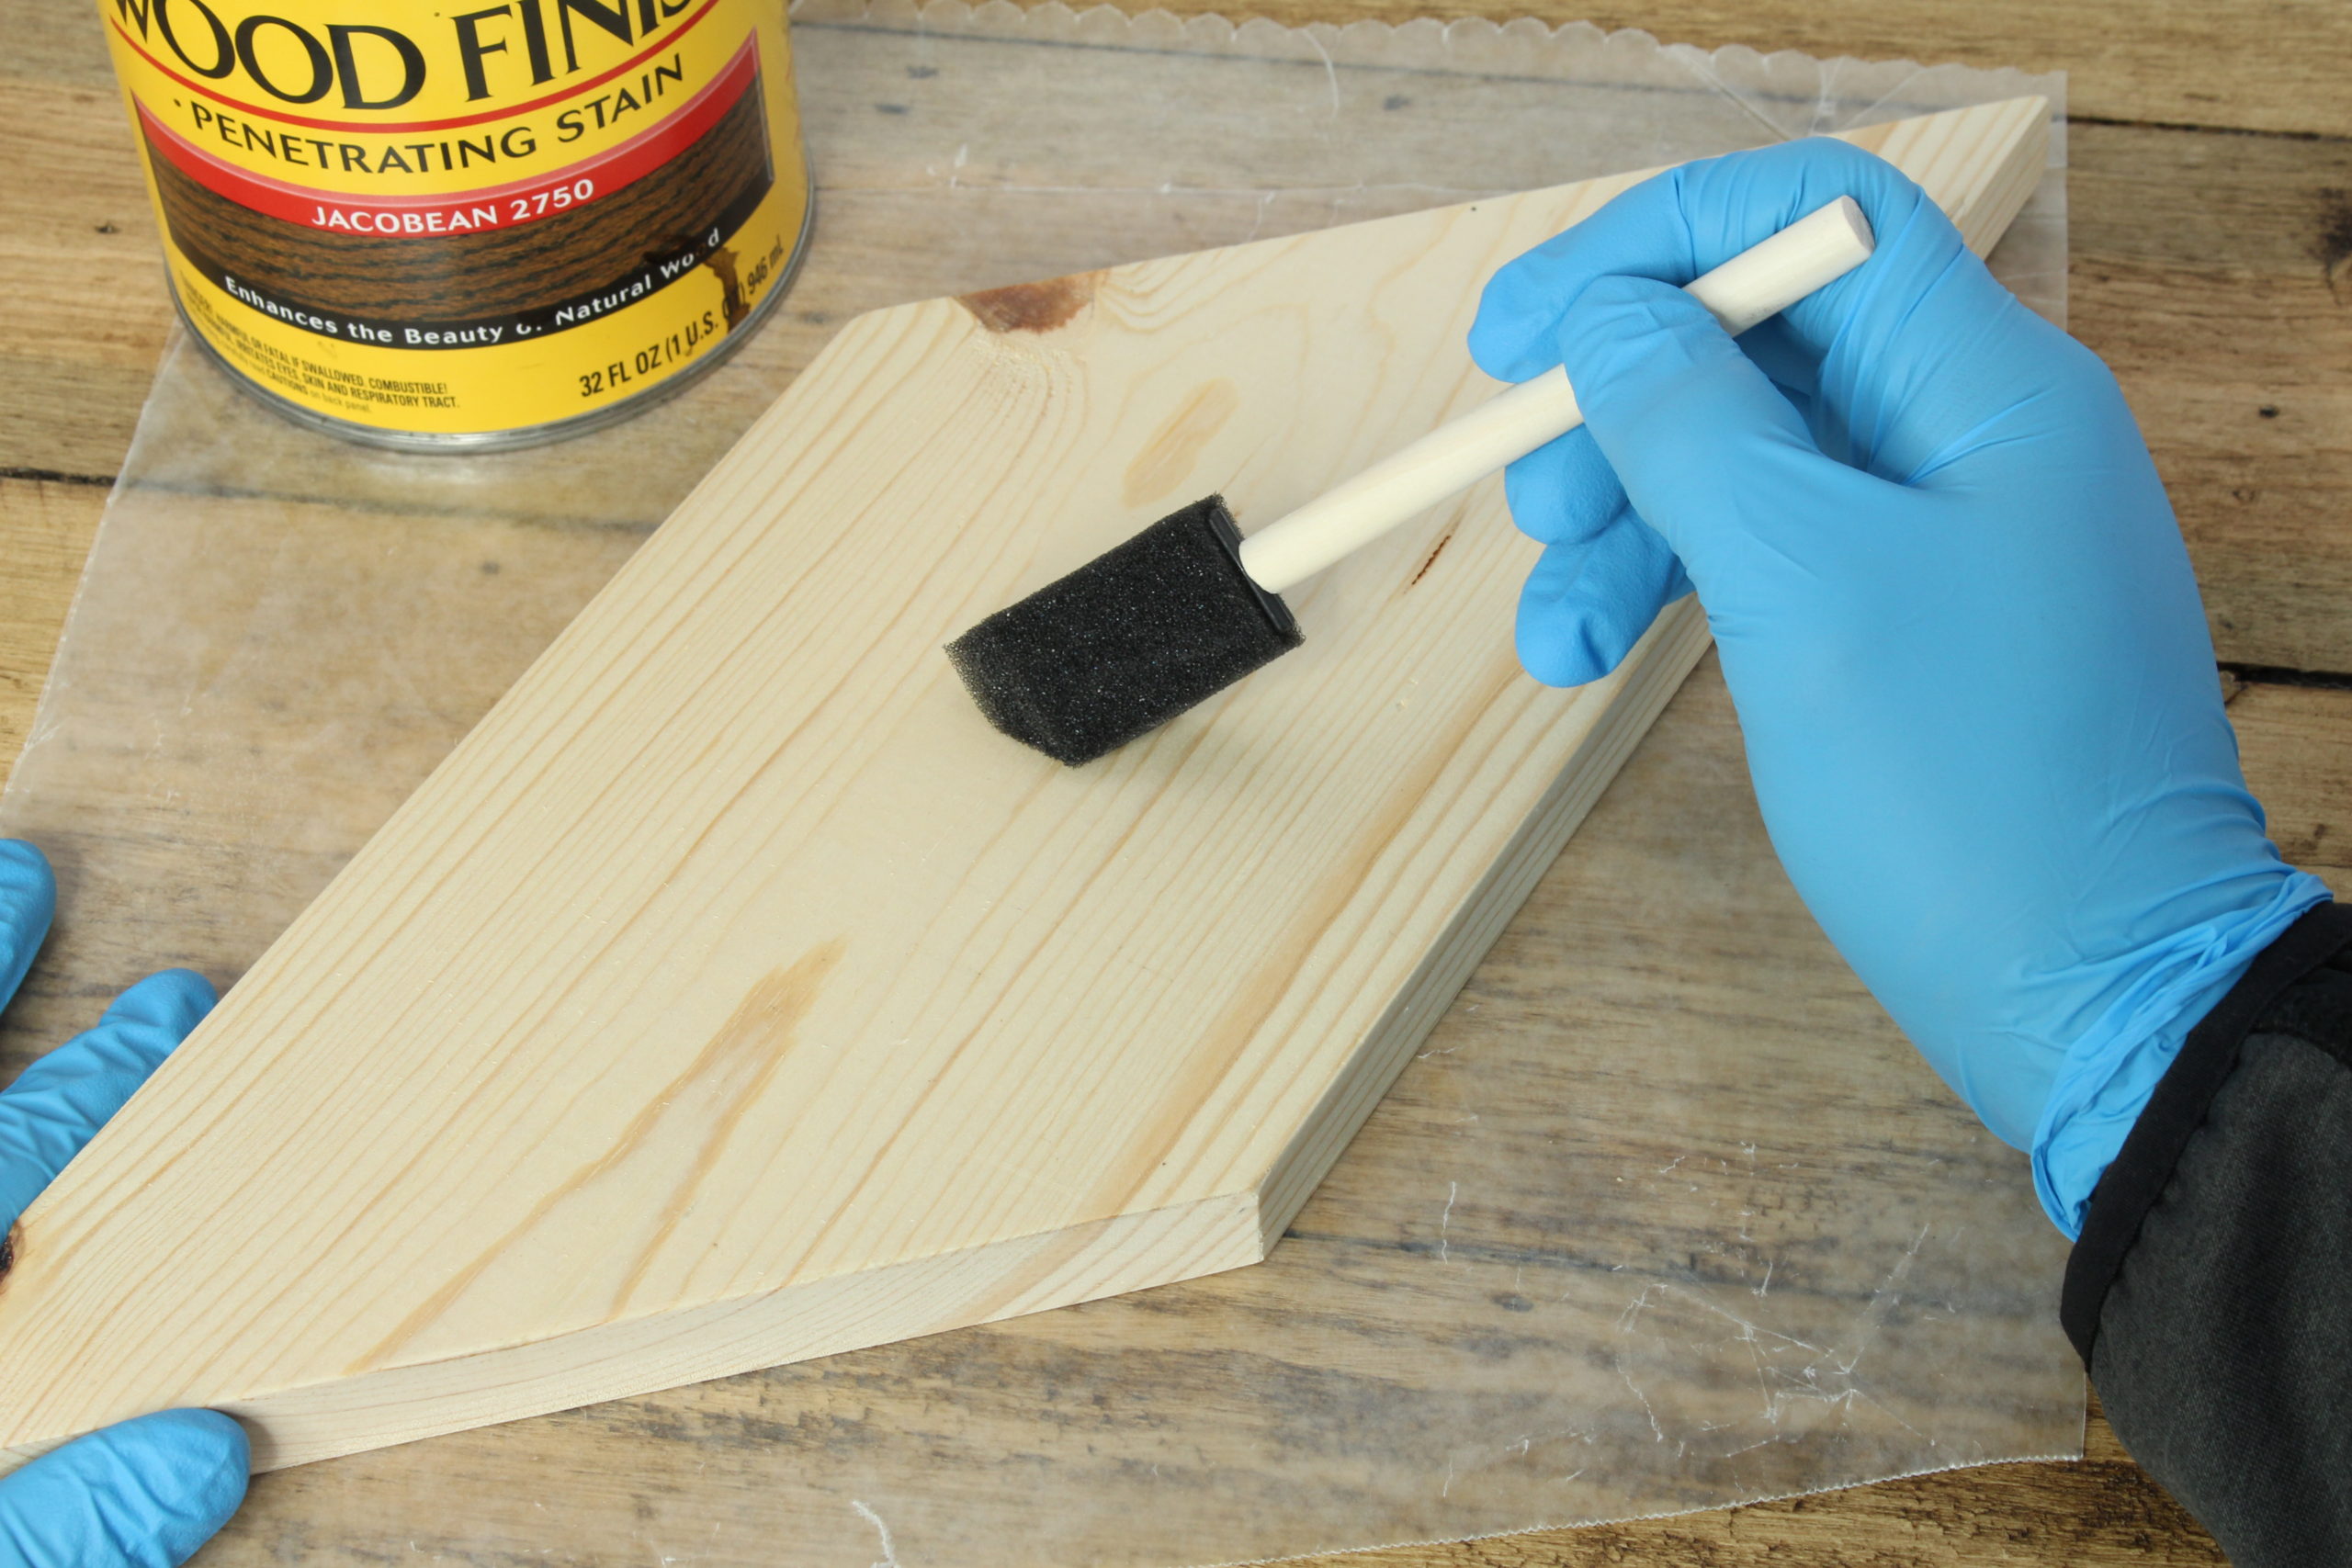
[If you have never stained wood before, I will share my process with you. First of all, use gloves, trust me. I like to use Nitrile Gloves for all my painting and staining. I also cover my working surface with wax paper and use foam brush to put in a heavy coat of the stain on all visible sides. Let it sit for a couple of minutes and then wipe away the excess with a paper towel. Flip the piece around and follow the same steps on the other side. And you are done! See, that was easy 🙂 ]
When your segments are completely dry, setup your pocket hole Kreg Jig K4 for 3/4″ thickness and make 2 pocket holes in the center of one of the segments.
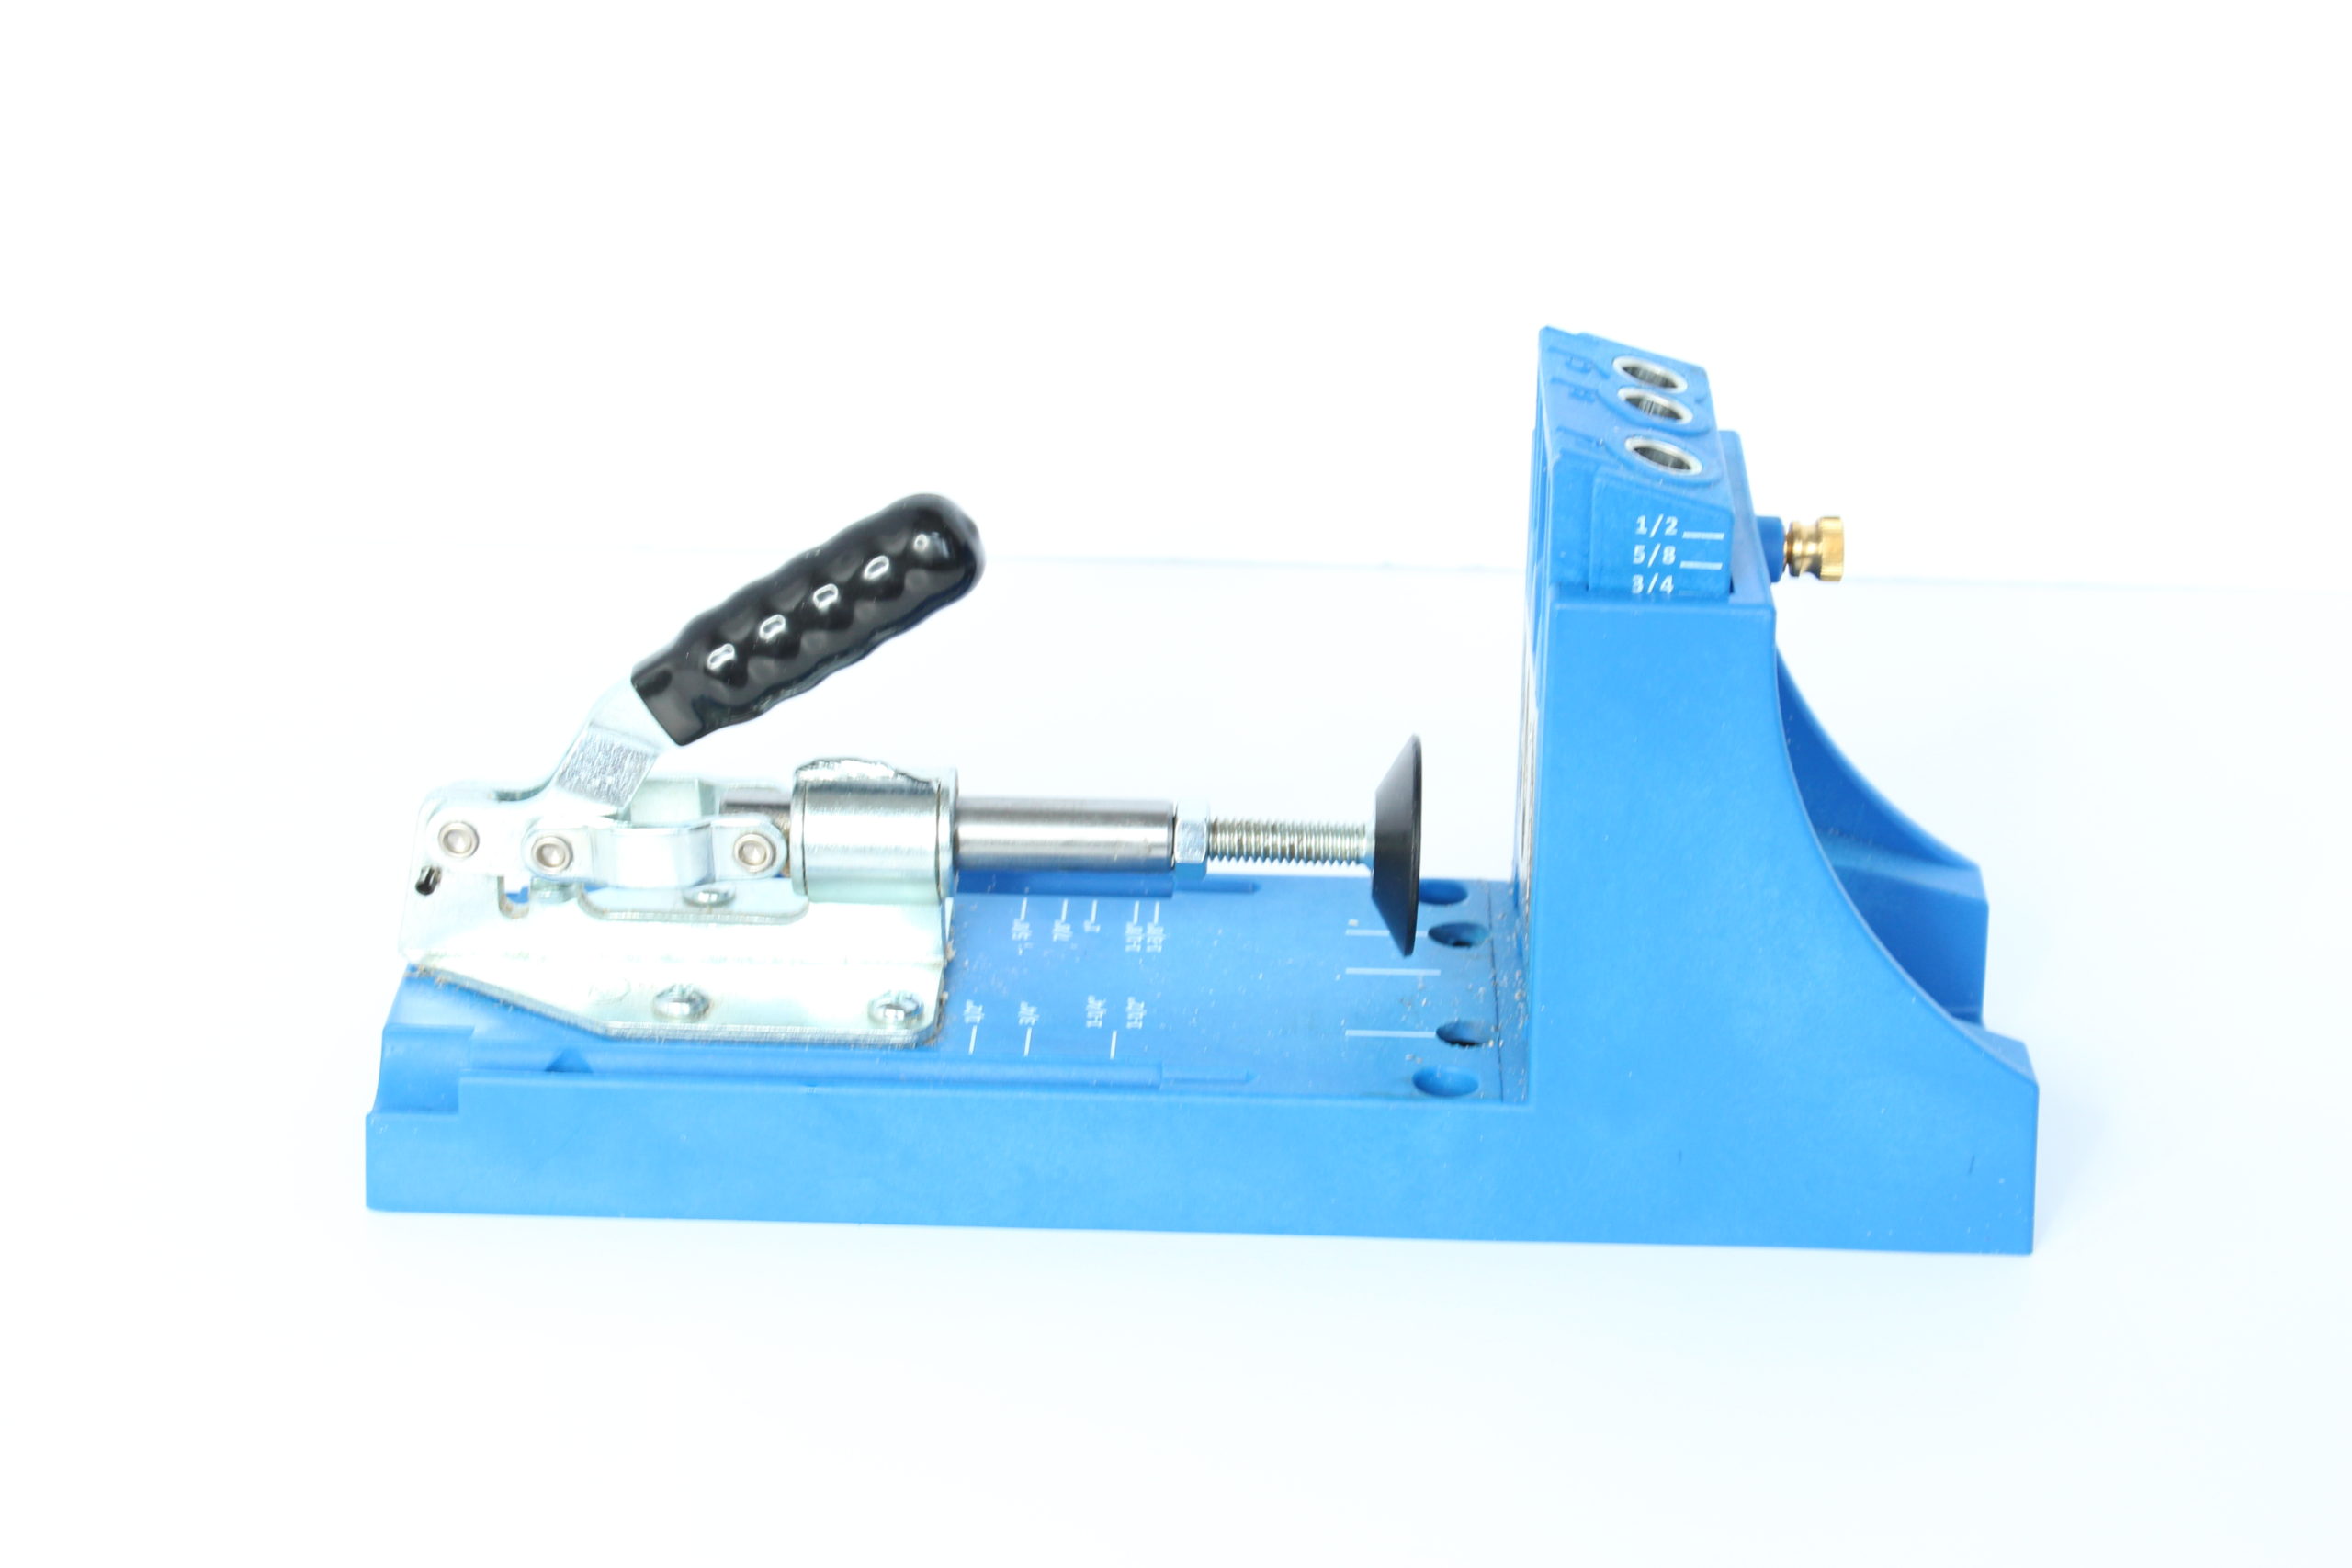
Using a two 1 1/4″ pocket hole screws, screw the two pieces together while ensuring that both of them remain aligned.
And, that’s it! You are done!!
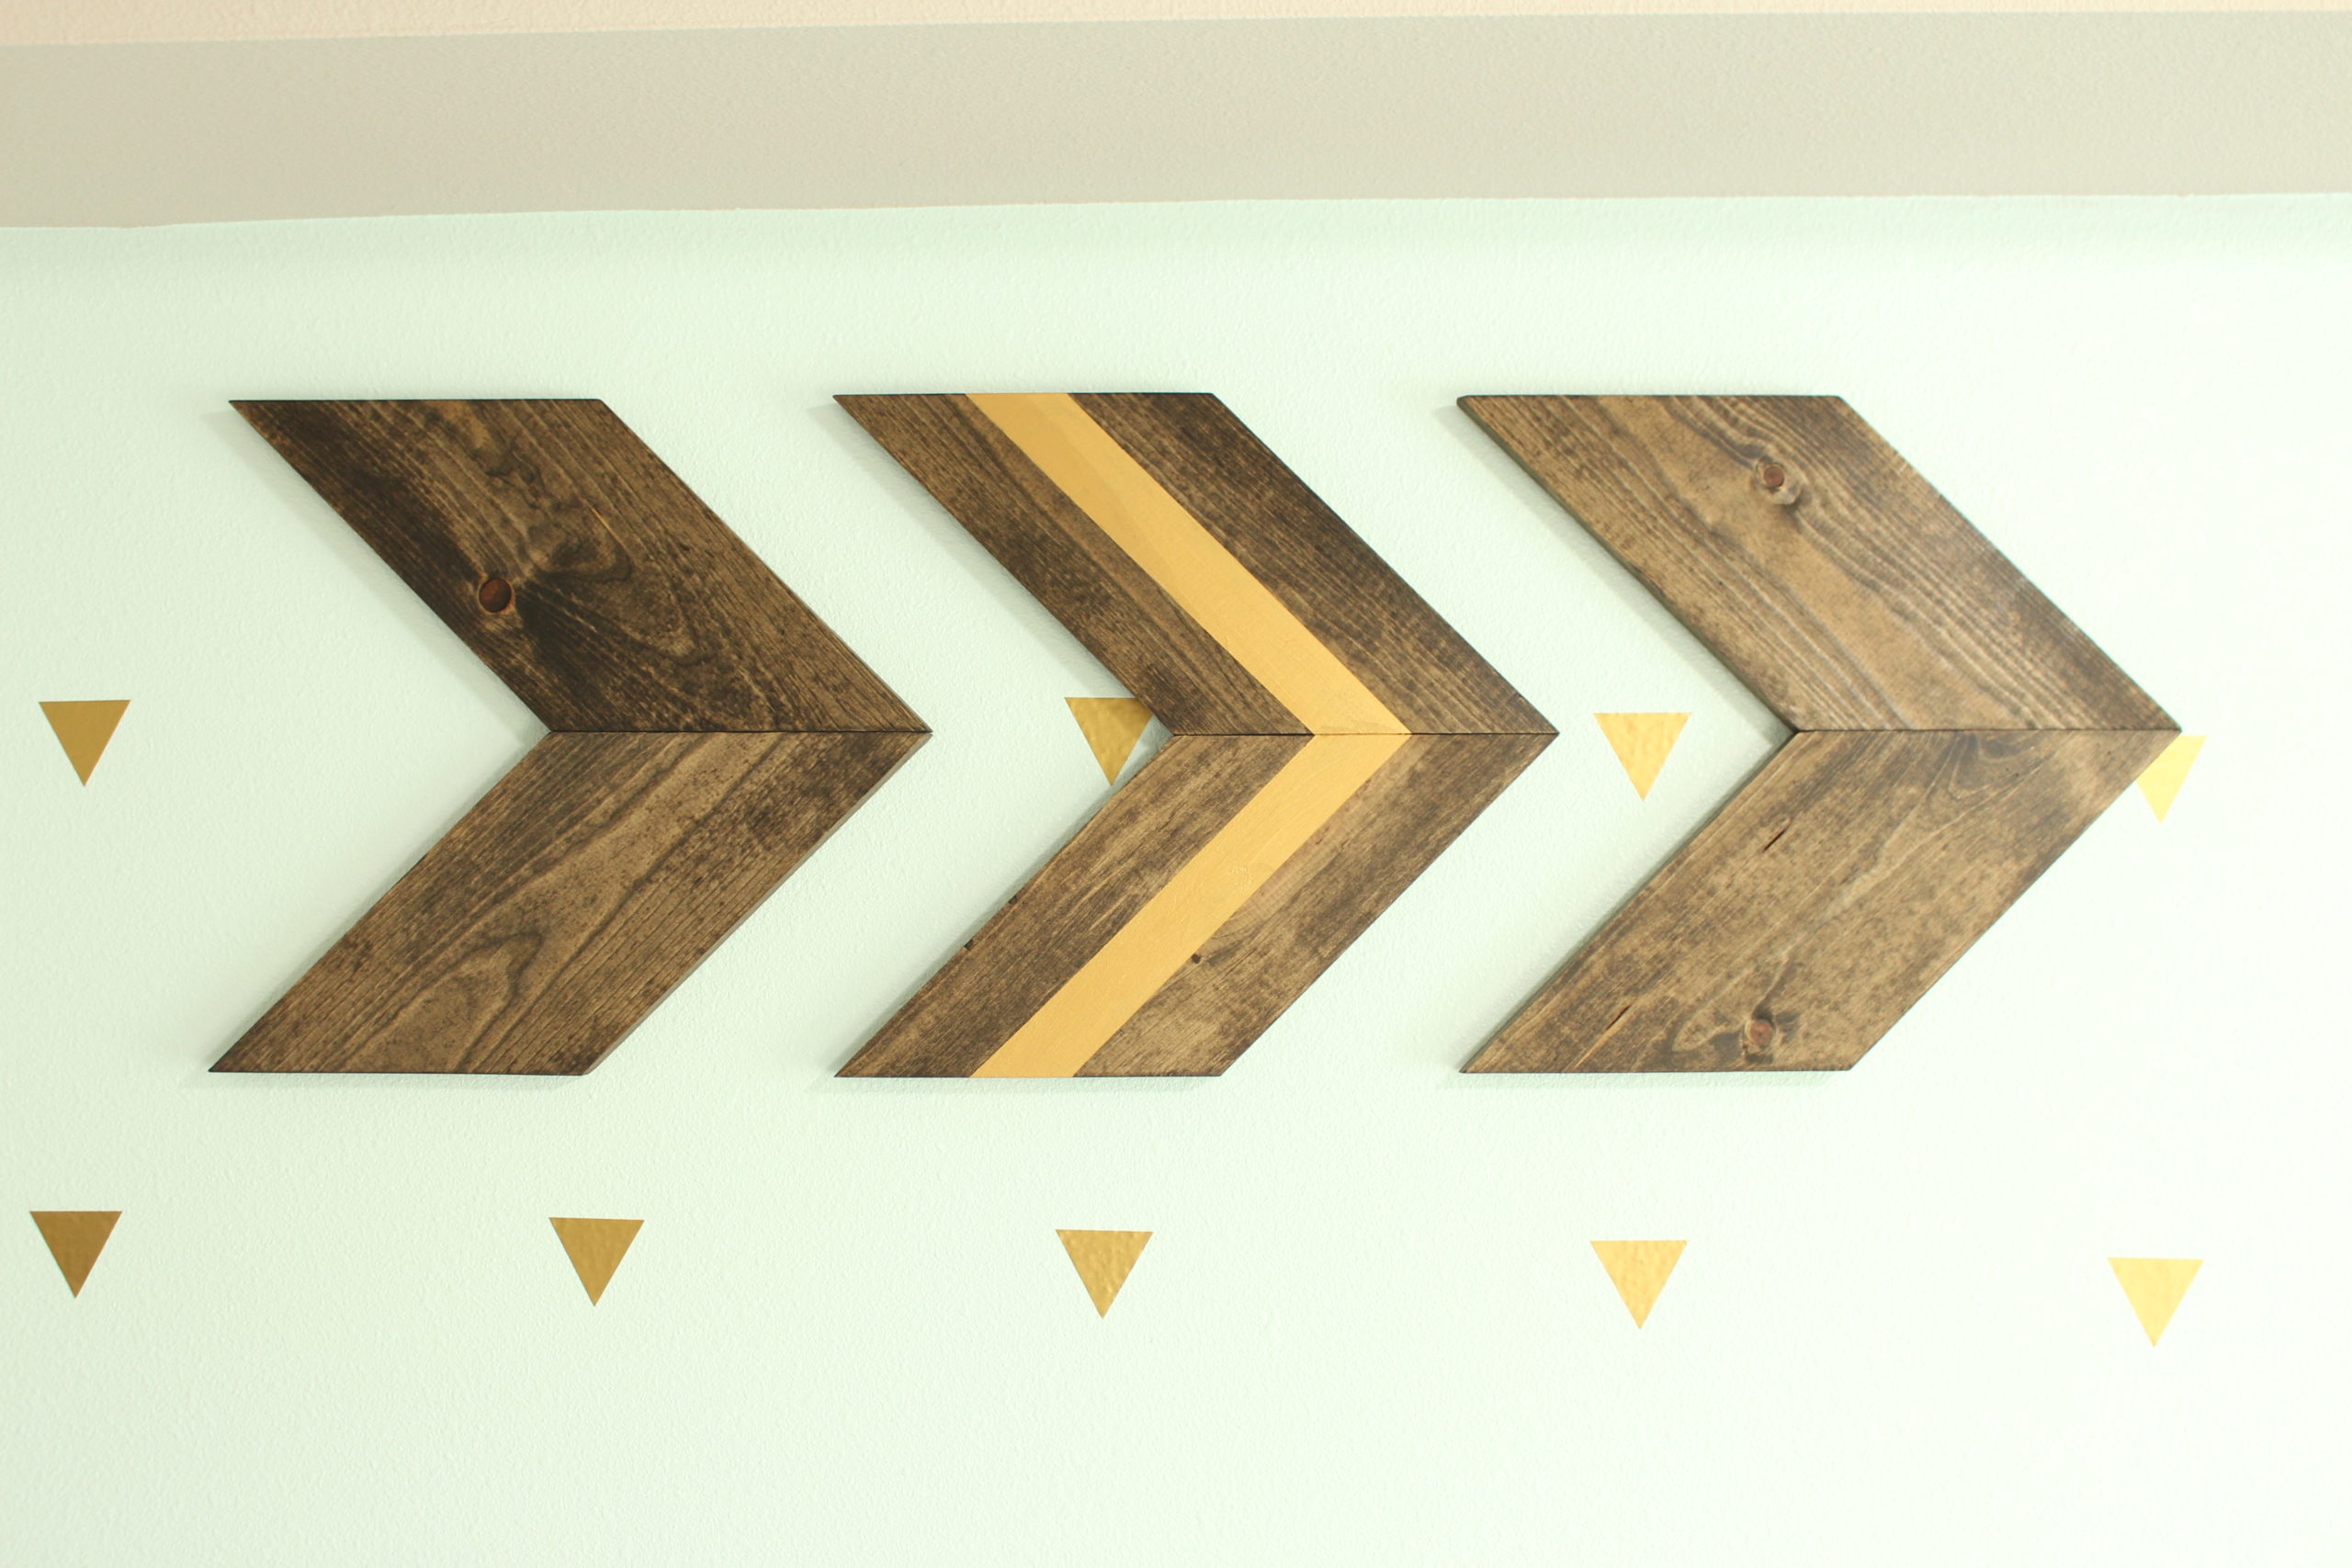
You can stylish your pieces a little bit more, like I did adding a strip of gold metallic paint to the middle chevron of my set. Aren’t they cute?
Now it’s your turn! Go build something and make sure to share your pics with me in the comment sections.
-M
Note: This post may contain affiliate links. By clicking on them and purchasing products through my links, I receive a small commission to no additional cost to you. Thanks for supporting aqua-n-gold.