Today I am going to show you how to do my version of a ladder shelf. If you follow my Instagram, you know that I participate in local market events from time to time. On top of building products for the event, I had to come up with a cute way to display my products. It needed to be big enough to accommodate multiple designs but it also needed to be collapsible, so I can pack it away and fit it in my car. So, when I started to see ladder shelves online, I decided to build my own and show you how I did it.
WHAT DO YOU NEED TO BUY?
4- 2″ x 4″ x 6′
2- 1″ x 4″ x 6′
4- 1″ x 6″ x 6′
2″ Wood Screws (I use SPAX Screws)
Wood stain of your preference ( I used MinWax in Mahogany)
1 set of Saw Horse Brackets
WHAT TOOLS DO YOU NEED TO HAVE?
Drill (I use my Ryobi Cordless Drill)
Miter Saw (I used my Dewalt 12″ Double-Bevel Compound Miter Saw, but you can do these cuts with a 12″ Hand Saw and a Miter Box )
Brad Nailer (I used my Ryobi Brad Nailer )
HOW TO DO THIS PROJECT?
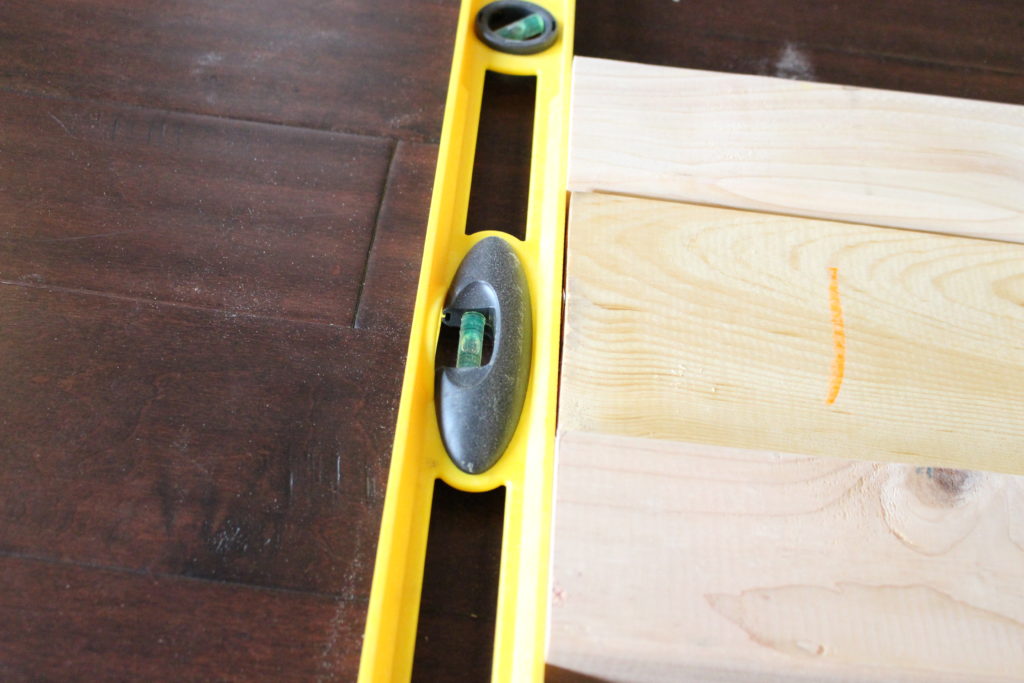
The first step is to figure out the spacing for your shelves. I am going to be displaying wood signs so I just needed a couple of inches. I decided to use a single piece of 1″ x 6″ x 6′, but you can totally use two and have an 11″ deep shelf. To figure out the length of your spacers or “steps”, align your shelf piece between two 2″ x 4″ as shown on the picture below.
After that, start measuring from the bottom up to where you want your first shelf to go. I marked the width of my first step (3.5″) and then the width of my shelf (3/4″) and then I repeated the process for all my four shelves.

Now it’s time to put in the ladder steps, which are made of 1″ x 4″. Since my shelves are 5.5″ wide, the length of my steps is 12.5″ (5.5 + 3.5+3.5). After cutting all 4 steps for my ladder shelf to the right length, I joined them in place with wood glue and brad nails. Remember to use a straight edge to make sure your steps are not crooked. Apply a little bit of wood glue and nail it in place.
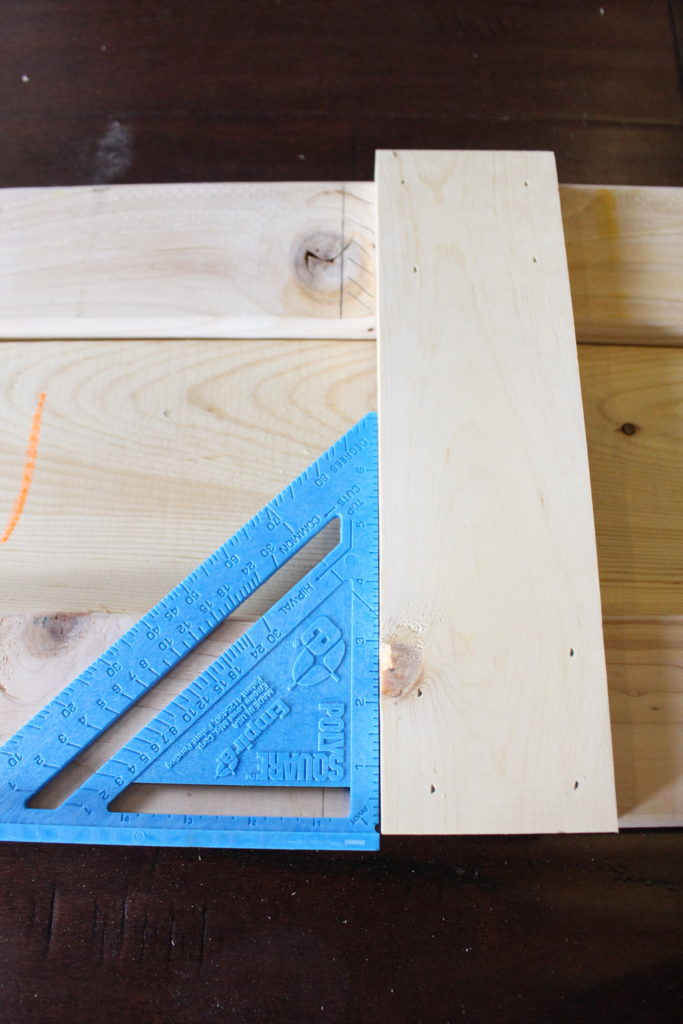
Repeat the process for each step and you got yourself one half of your ladder shelf. Now follow the same steps for your second half using the first one to transfer your measurements.
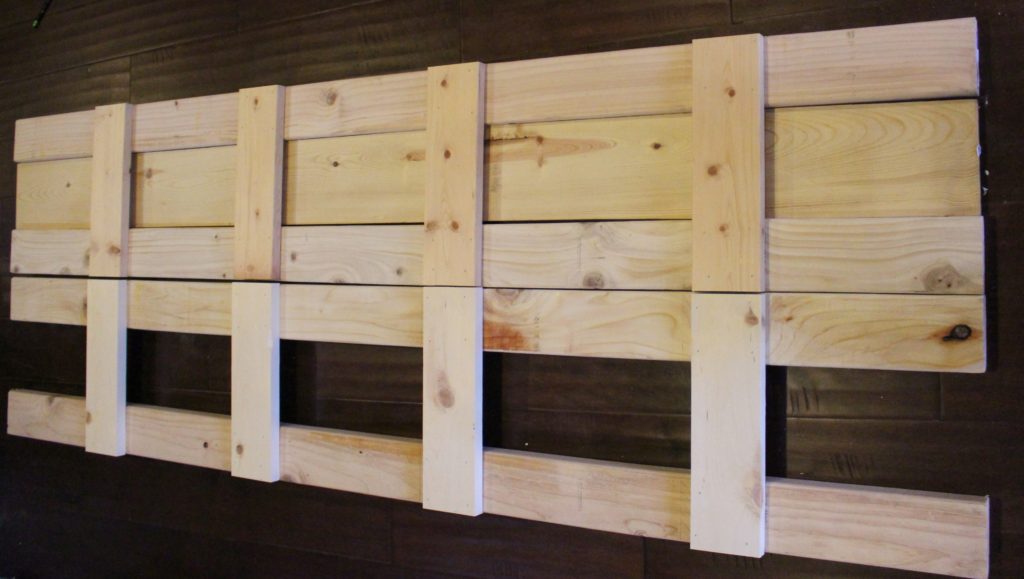
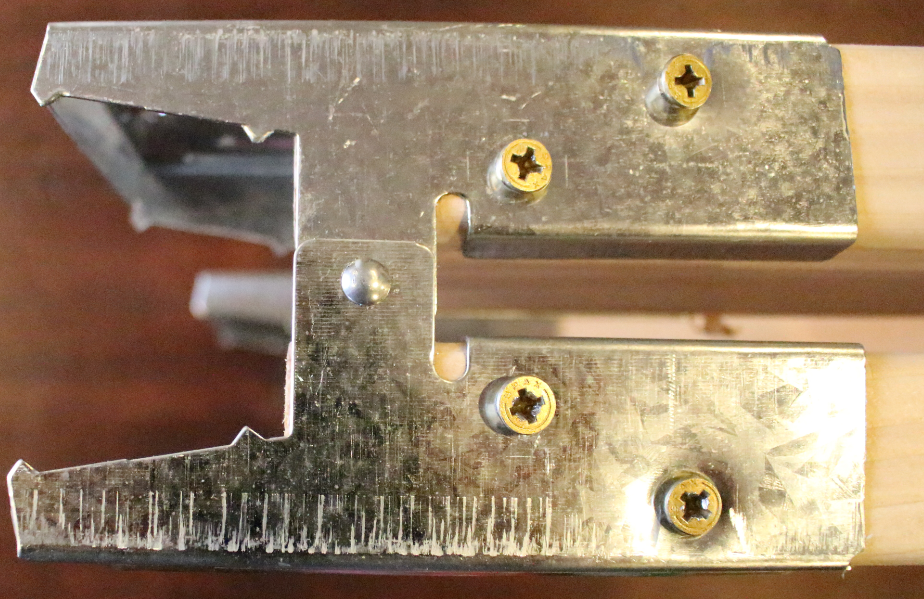
Now it’s time to assemble your ladder shelf using the sawhorse brackets. These are super easy to install. Just align your two halves on their side with the steps facing outwards and slide one sawhorse bracket on each side. Push it until your lumber reaches the bracket inside and its all the way in.
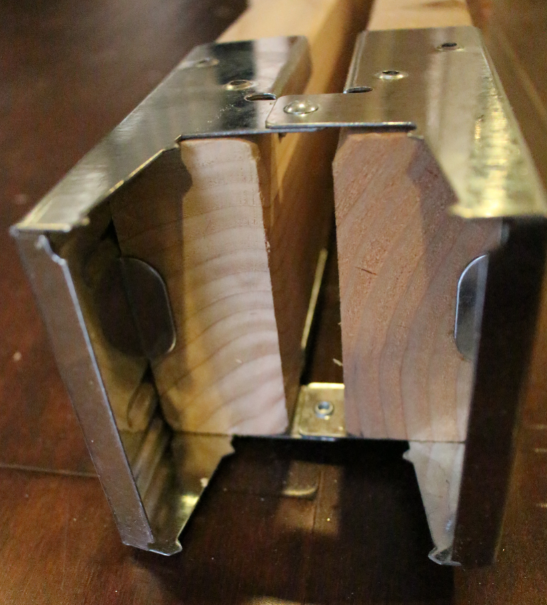
For the second bracket, you might need a little help since it might not align perfectly. That’s OK. Just use a hammer and do gentle taps on the end of the board to help it slide in. Then screw all 4 screws on the outside to secure the studs in place. I decided to use 2″ long screws and just do the outside screws because my drill wouldn’t fit to do the inside ones. It feels super secure so… I think we are good. 🙂
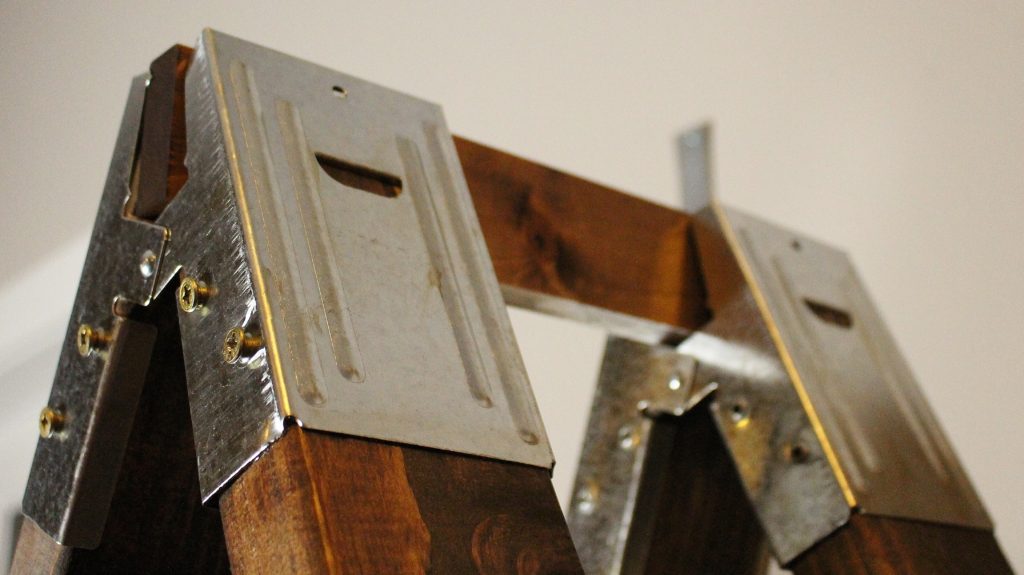
Now open your ladder shelf and figure out how wide of an angle you would like your ladder. I wanted it pretty wide so I can accommodate as much product as possible. Slide a piece of lumber on the top of the ladder across both brackets. It should look like the picture below. I used a remnant piece of the 1″x 4″. I measured the length from bracket to bracket and what height I needed it to be and I cut it down. My piece ended up being 12 5/8″ in length and ripped it so the height was exactly 2″. You can put a couple of screws on top to secure the brace in place, but I wanted the ladder shelf to be collapsible. This way I can just close it and remove the brace to store it away.
Now it’s time for staining. Stain your ladder shelf and make sure to get every corner including the inside. Remember to stain your shelves as well. Once all the stain dries up, slide your shelves in place. I cut the top one a little bit shorter to prevent it from tipping over since I am not nailing them in place. If you are not planning to store your ladder shelf away, go ahead and use your brad nailer to secure your shelves in place. And that’s it!! You are done!
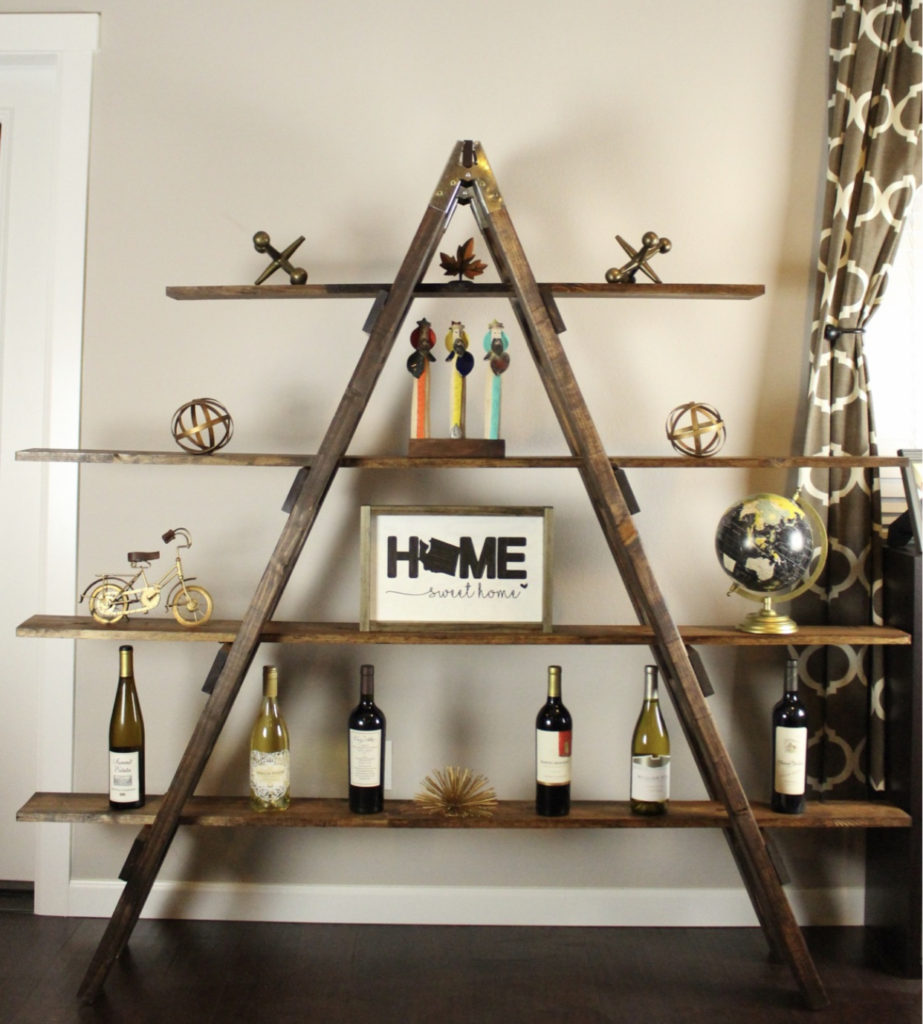
Now go ahead and build yours and show us your pictures in the comments sections.
-M