Building floating shelves has been on my resolutions for two years already. Not because I needed them, but because they look super cool. I haven’t had a real need for them, until now. Recently I started re-organizing and decorating my craft room, and I needed a dedicated space for my books. And it hit me, floating shelves!! So, I took some measurement and went at it. It took me about three days, only working on the afternoons, so this is a perfect weekend project for you.
As always, remember that the amazing part of Doing it Yourself is making it work for you. Use my process and measurements as an example, but make it fit for your space and style. 🙂
WHAT DO YOU NEED TO BUY?
1 full sheet of 1/2″ thick plywood
2- 2″ x 4″ x 8′
Small box of Kreg 1-1/4″ Pocket Screws
Small Box of 3″ Wood Screws
Wood stain of your preference ( I used Minwax Wood Stain in Jacobean color)
WHAT TOOLS DO YOU NEED TO HAVE?
Pocket Hole Jig (I have the Kreg Jig K4 but you can do this with the Kreg R3 Jr. that is less expensive)
Drill (I used my Ryobi Cordless Drill)
Miter Saw (I used my Dewalt 12″ Double-Bevel Compound Miter Saw)
Table Saw to make the rip cuts (I have a Porter Cable job site saw, but you can have your hardware store make those cuts for you)
Sand paper or Orbit Sander (I used my Bosch Random Orbit Sander)
Brad Nailer (I recently bought a Ryobi Brad Nailer , and it made this project a breeze)
HOW TO DO THIS PROJECT?
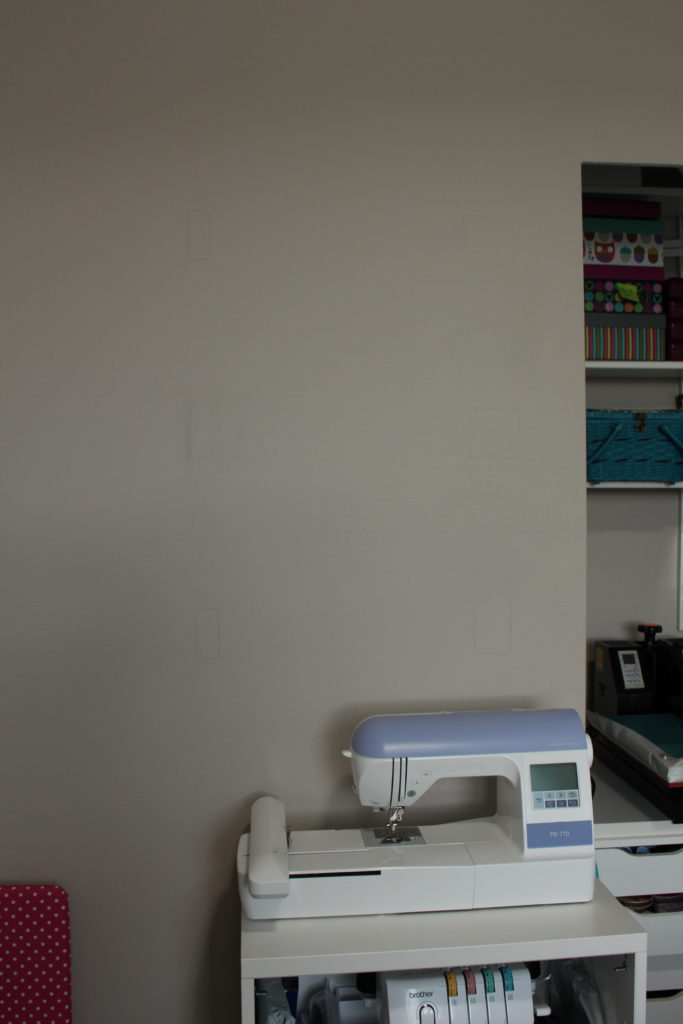
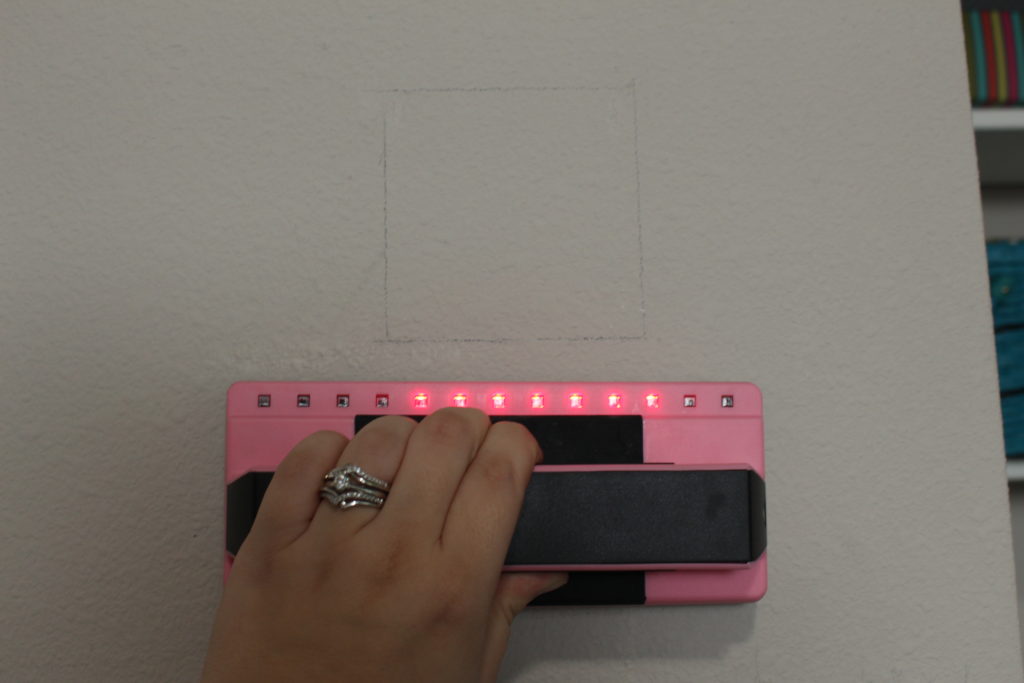
The first step is to select the area where you want to build the shelves. Measure how big you want them and ensure that you are hitting at least two studs on the wall. Below is a picture of the area where my floating shelves will go, and one of me looking for studs.
I got to be honest, I’ve had like 4 studs finders and I hated all of them. There is something about it that is more like a guessing game, rather than a science, that drives me crazy. That’s is why I LOVE my new Stud Finder. It has lights that lets you know exactly how wide your studs are, so you can drive your screws in the middle of the stud every time. And its also pink 🙂 . (It’s a little more expensive than others, but trust me, its worth it.)
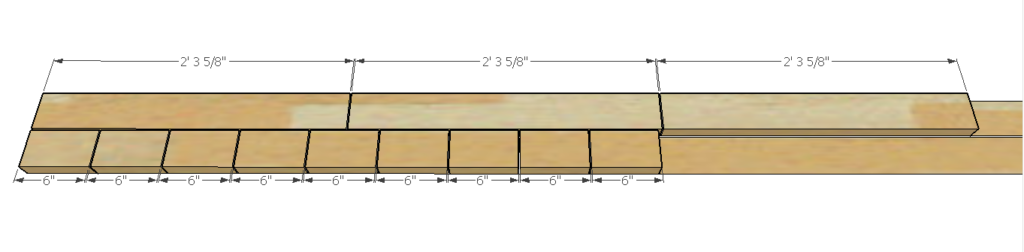
Then, you proceed to make all of your cuts. You will need a sheet of 1/2″ plywood and two 2″ x 4″ x 8′. You can follow the cut diagrams below to make your cuts. If you don’t have a table saw you can ask your hardware store to rip the plywood into strips for you (2- 7 1/2″ strips and 2- 4 1/2″ strips).
Plywood Cut List
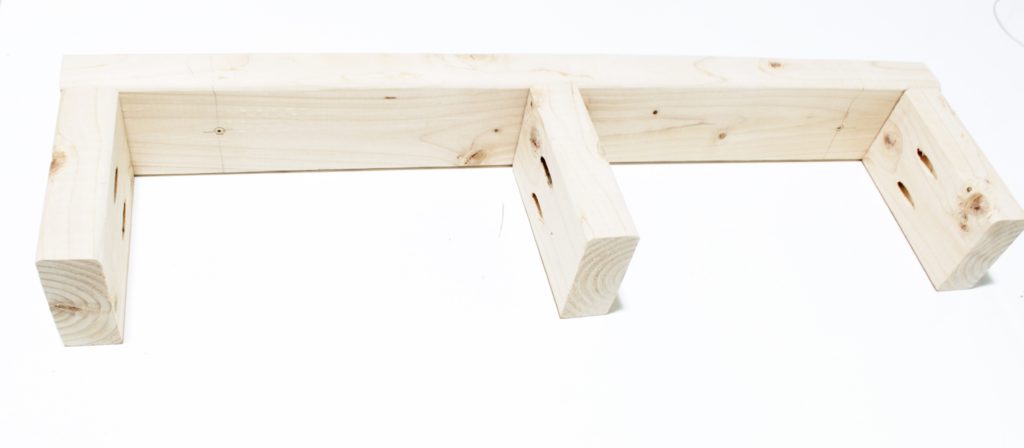
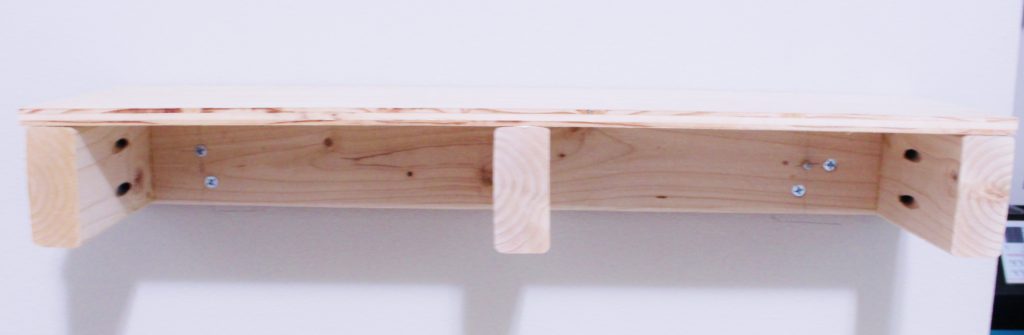
Now that you have everything cut to size, is time to assemble the frames of your shelves. The frames are made out of the 2″ x 4″ segments. Each frame has a long support and three smaller segments. I put the frames together using 1 1/4″ pocket holes screws and Wood Glue. When using your pocket hole make sure you setup your jig for 1 1/2″ thick material. The frames should end up look like this:
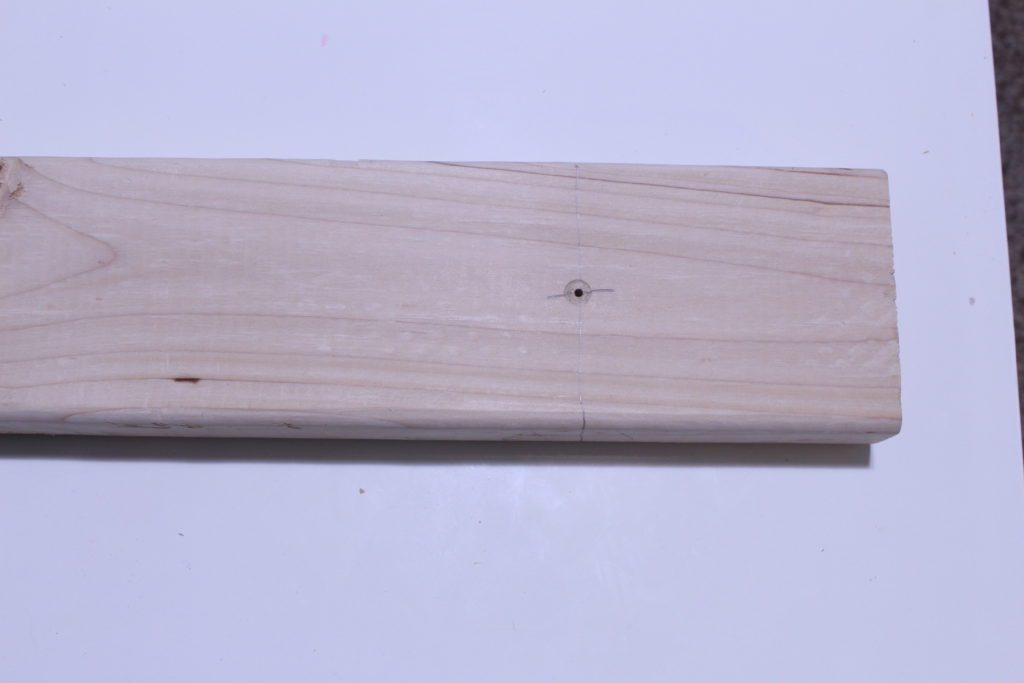
Then, align your frames to where you want the floating shelves on the wall and mark where you will be driving the 3″ wood screws. It is always good to pre-drill your frames to prevent cracking. Now that you know where your screws go, drill your frame to the wall studs making sure that your surface is straight.
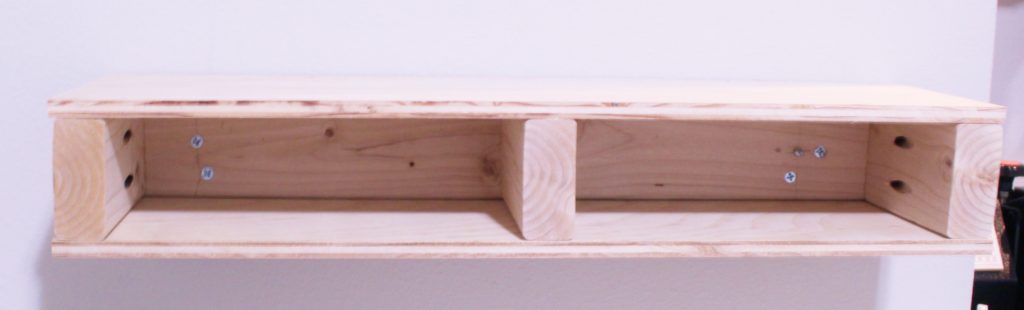
After your frame is secured to the wall, it’s time to attach the top panel. I attached all plywood panels using wood glue and 1 1/4″ brad nails. At this point your floating shelf should look like the picture below.
The next step is to attach the lower panel, the same way we just did with the top one, using brad nails and wood glue. You can see the front and side view of the floating shelves at this point.
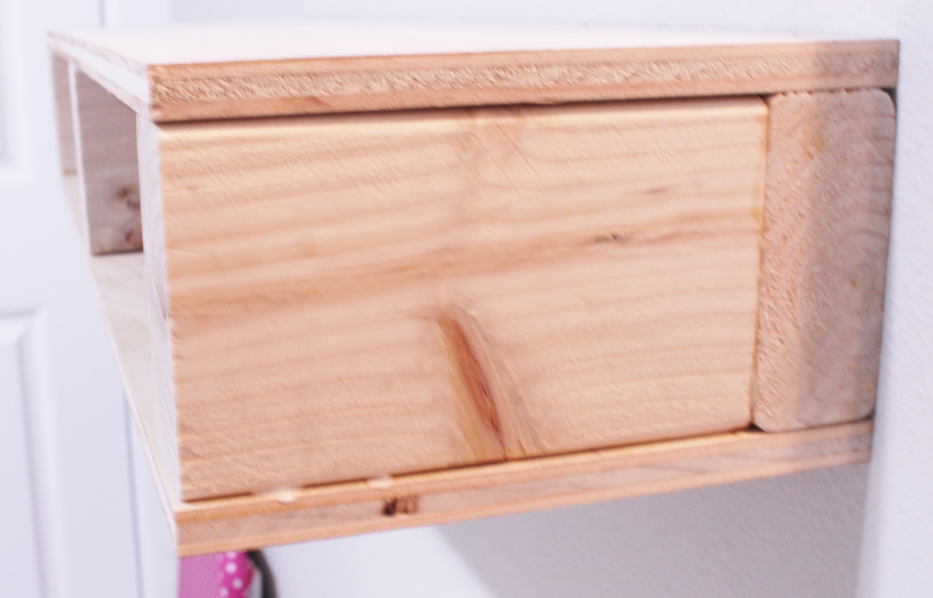
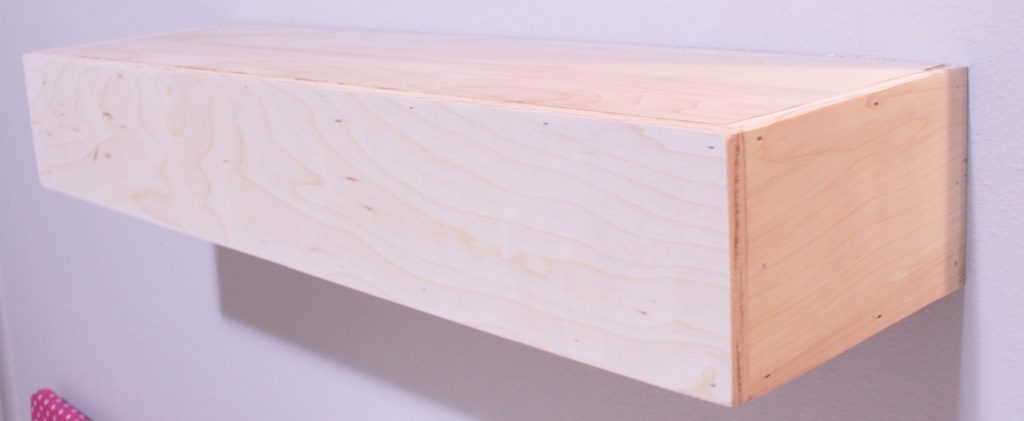
Next, attach both side panels following the same method. Finally, attach the front panel. The final product should look like this.
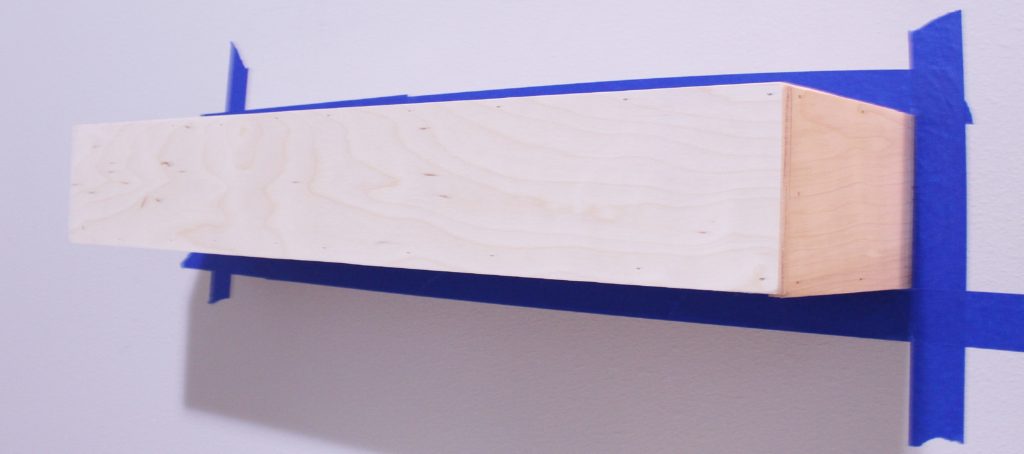
In order to prepare for staining, make sure you sand the shelves on all sides using sanding paper or an orbit sander. I did two passes with my orbit sander, the first one with p80 grit and the second one with p120. Then tape all of your borders with painters tape to prevent staining your wall.
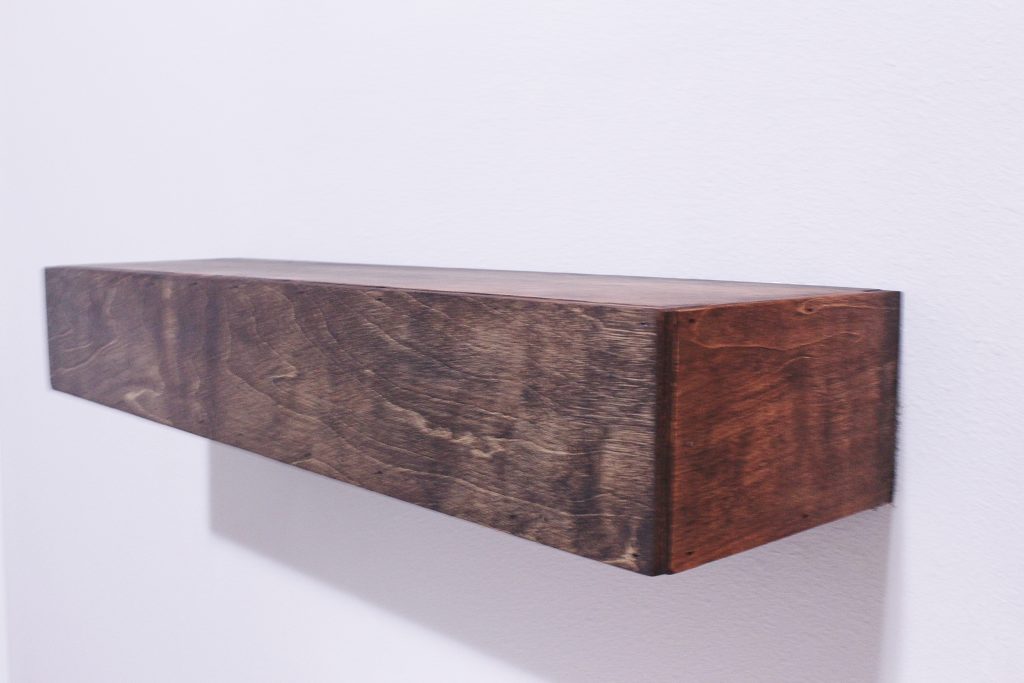
Now it’s time to stain your floating shelves with your favorite stain color, I used Minwax Wood Stain in Jacobean color. The floating shelf ended up looking like this. Pretty, huh?
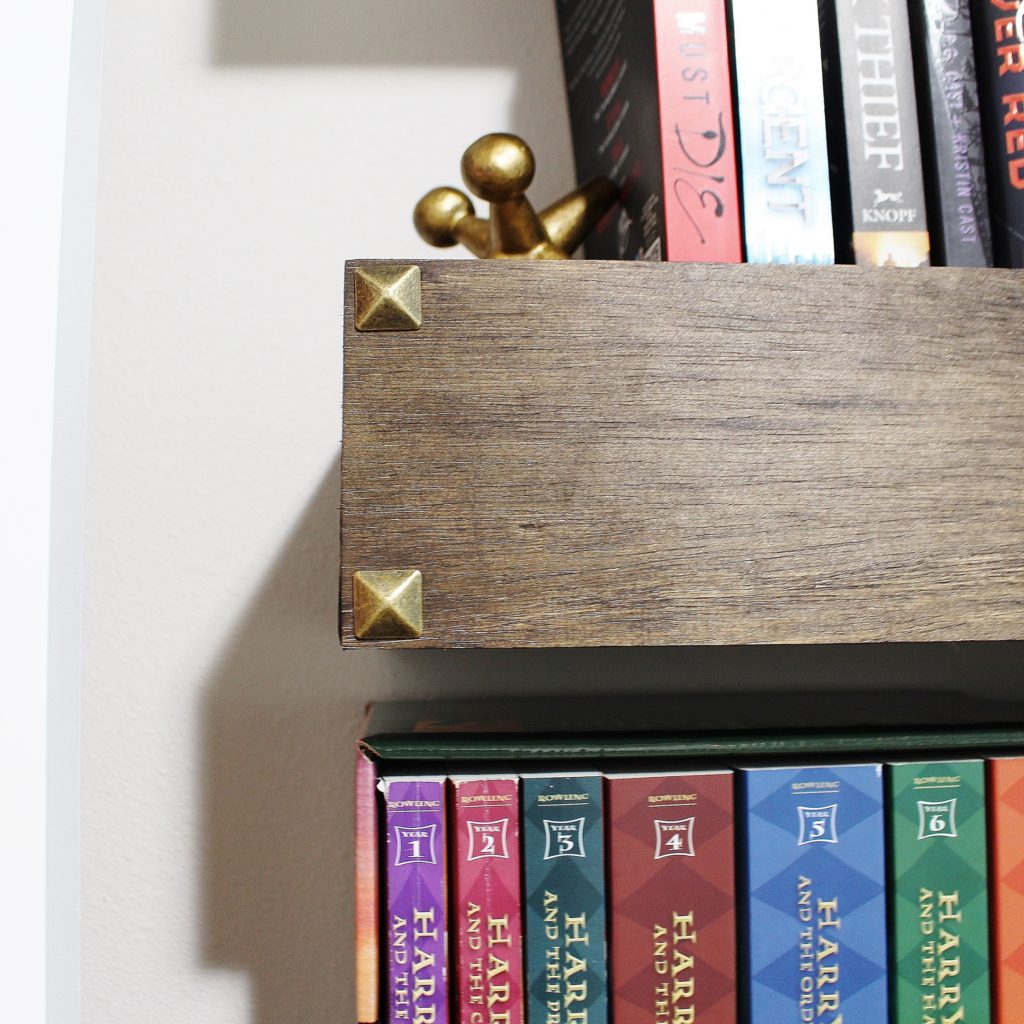
These floating shelves look gorgeous as is, but I decided to add a small detail to complete the look I was going for. I ordered these upholstery decorative nails and they look perfect. You just have to use a hammer to nail them in place.
And that’s it! You are done. Now you have gorgeous floating shelves in your house that you build yourself!
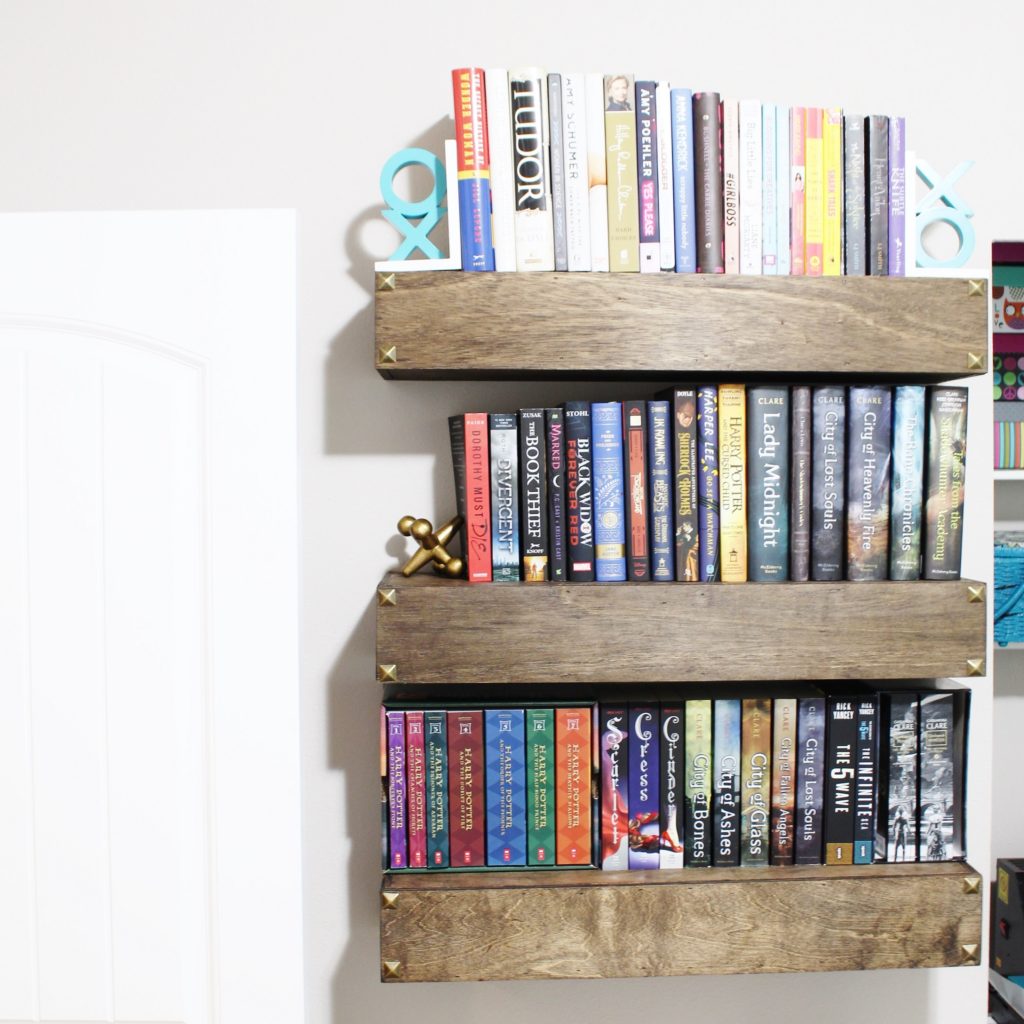
Here’s a shot of my floating shelves, now holding part of my book collection in my craft room. I absolutely love how they turn out!
Now go and build yours and let me know how you did in the comments.
-M