Today I am going to show you how to do a simple string art wood plaque. Lately, I have been looking online for pretty things to put on my craft room collage wall. After eyeing gorgeous string art pieces, I decided to try a simple one first and show you the process I went through to make it. I chose a very basic shape, that just so happens to be arrows. Yes, I know I am a little obsessed with arrows lately, but they are so cute.
WHAT DO YOU NEED TO BUY?
Wood stain of your preference ( I used Minwax Wood Stain in Jacobean color)
WHAT TOOLS DO YOU NEED TO HAVE?
Hammer
Your Hands! 🙂
HOW TO DO THIS PROJECT?
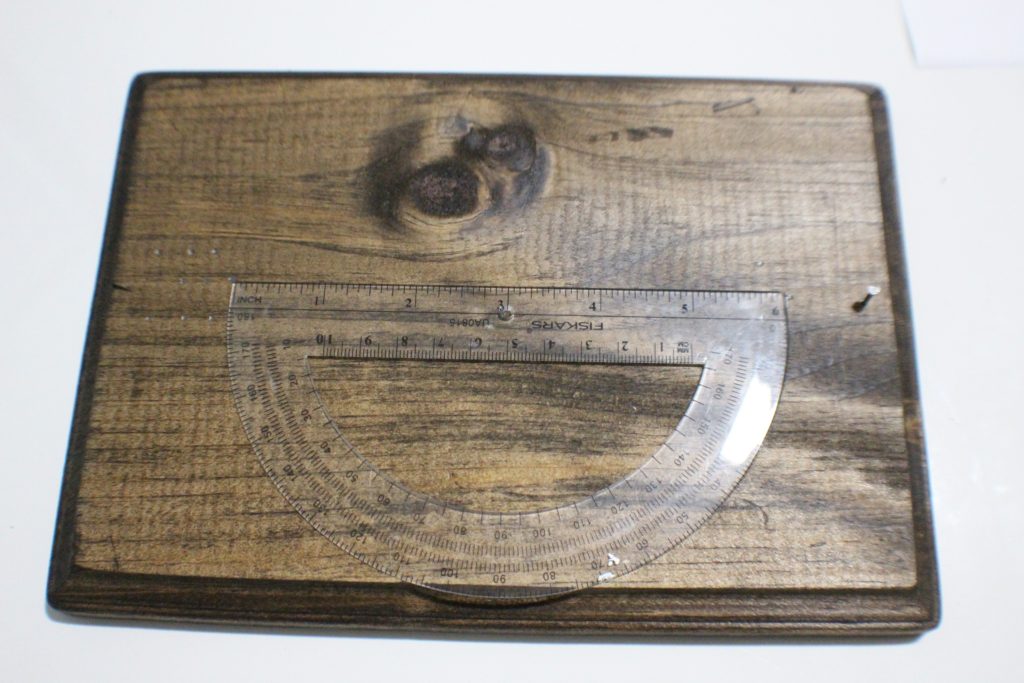
The first thing you need to do is stain your wood piece. Once it is stained, you can start planning your design and making measurement marks.
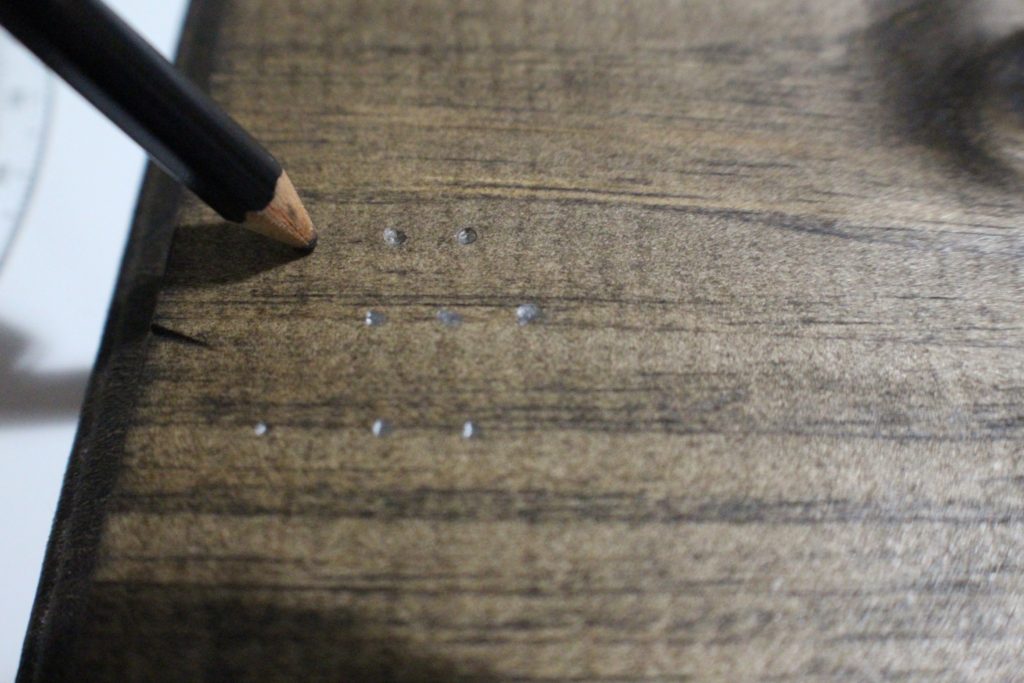
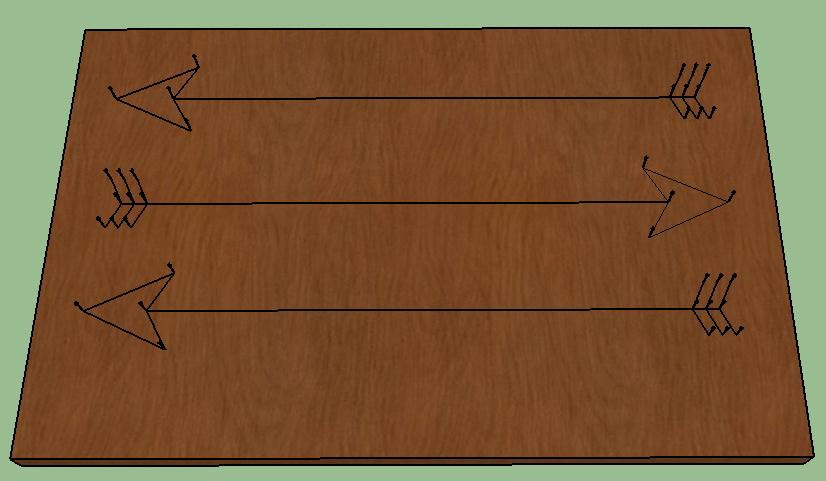
For this particular design I made marks for nails only on the corners and intersection of lines. See the diagram below for all the nail’s placements. For a more complicated string art design you might need to use a different technique. I might explore that on a future post.
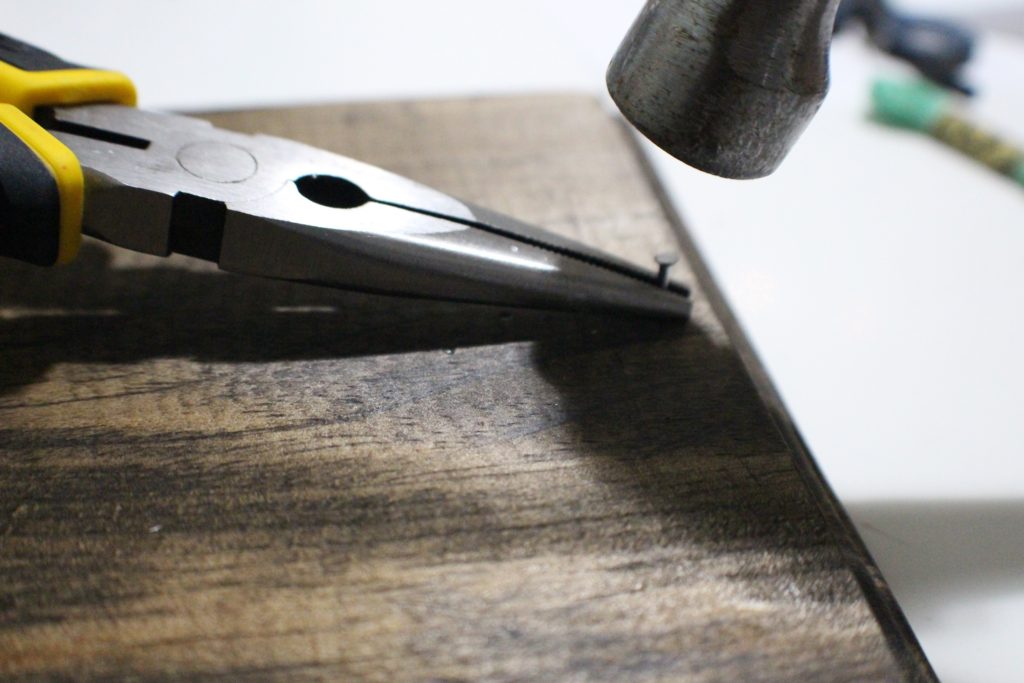
Now is time for all the nailing. I used some pliers to help me align the nails better and also to protect my fingers.
[Note: Do not get too excited with the hammering or you’ll get your nails through the other side. Experience talking here! If that happens, just slowly pull it up a little with your pliers.]
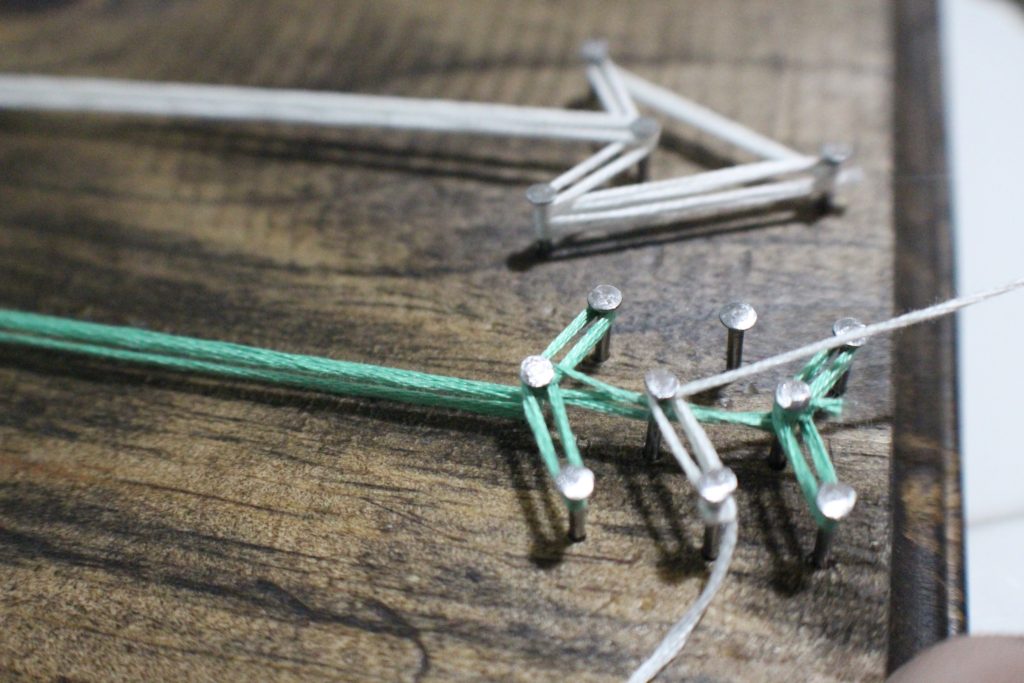
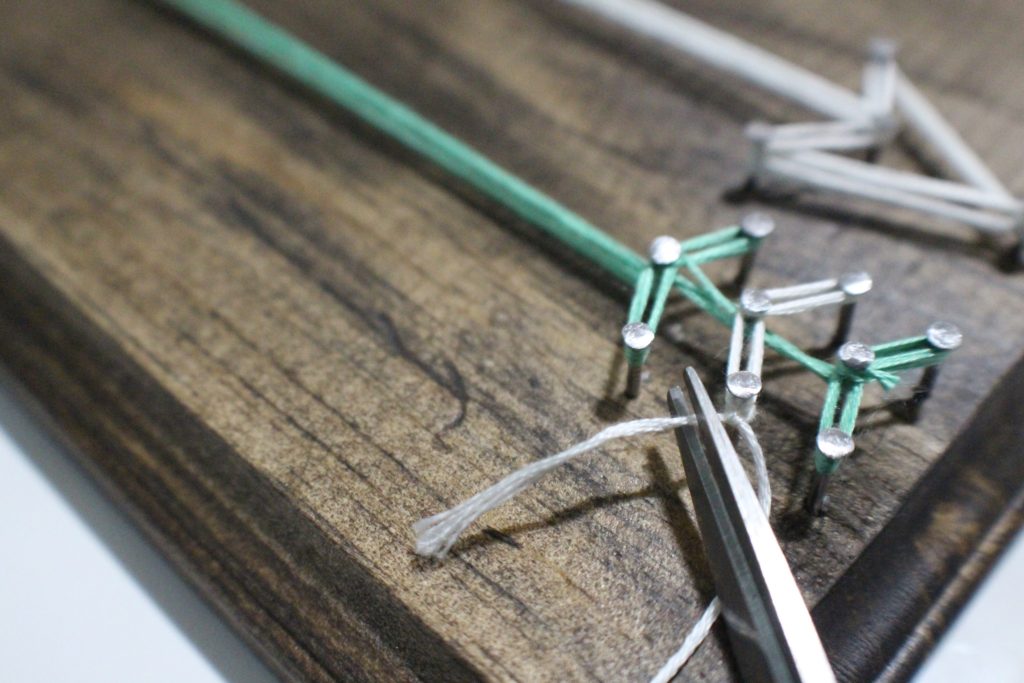
After you have all of your nails in place, it is time for stringing. I tried to work my way from one corner to the other. You start by making a knot on your first nail. Make sure to double it and make it super tight.
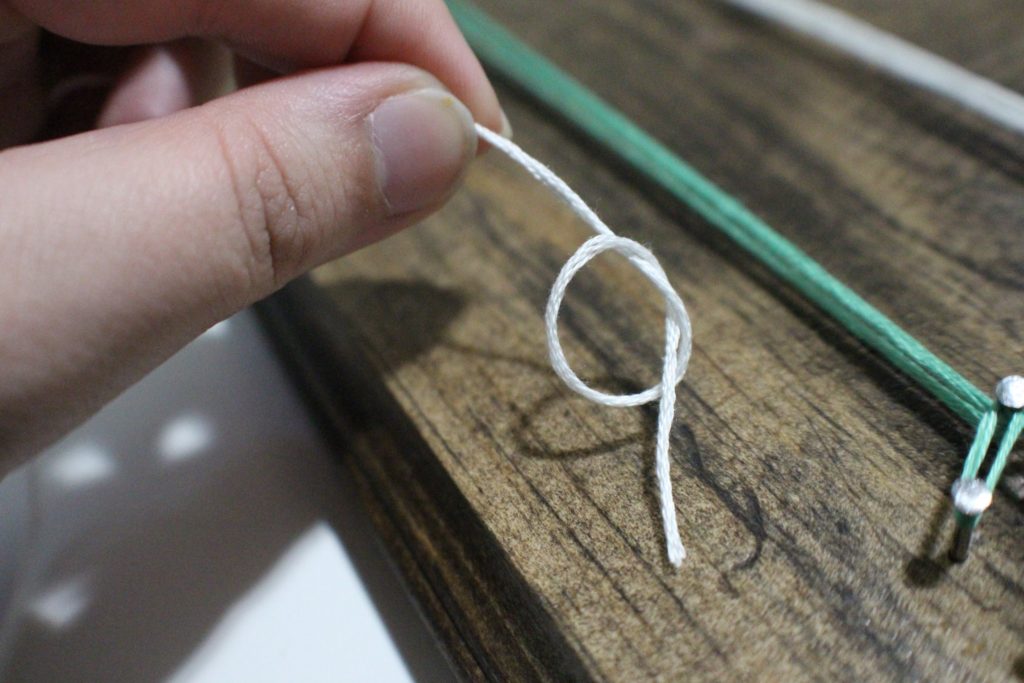
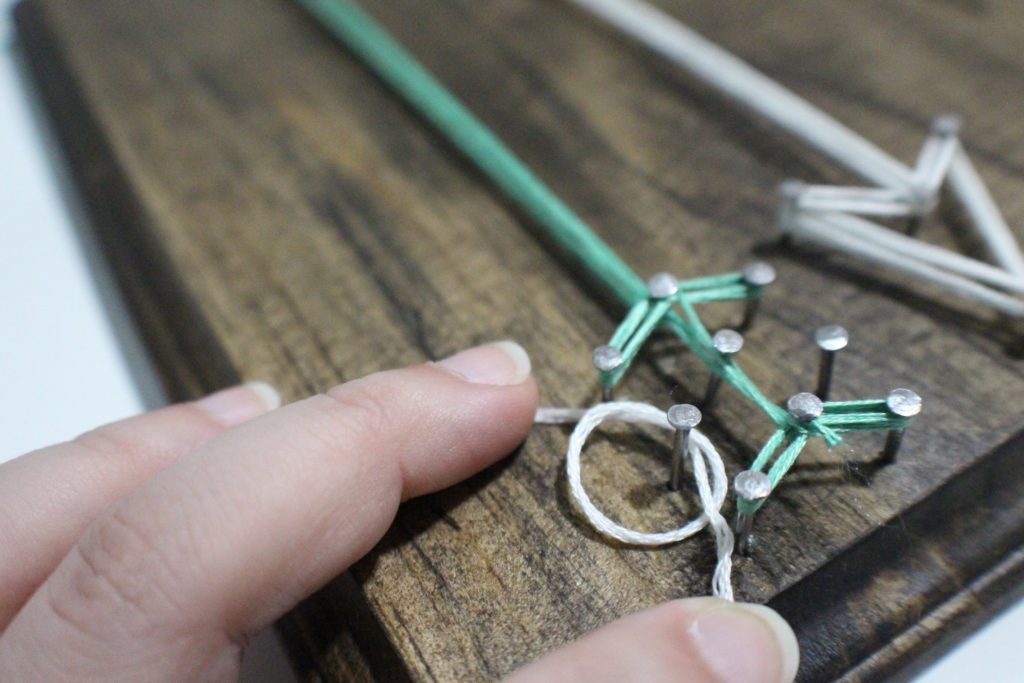
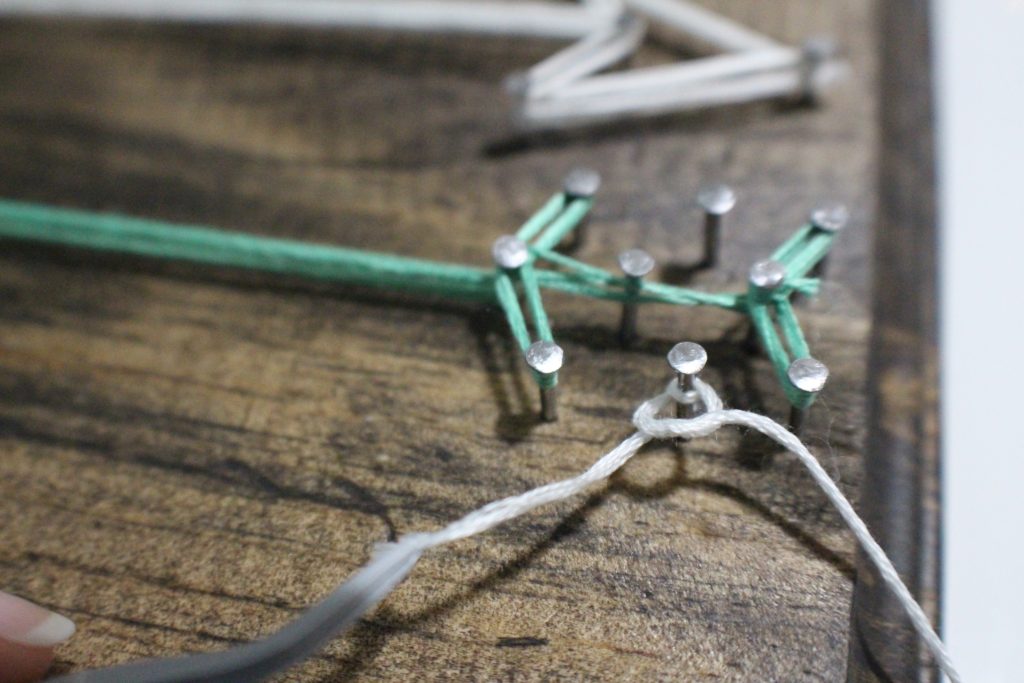
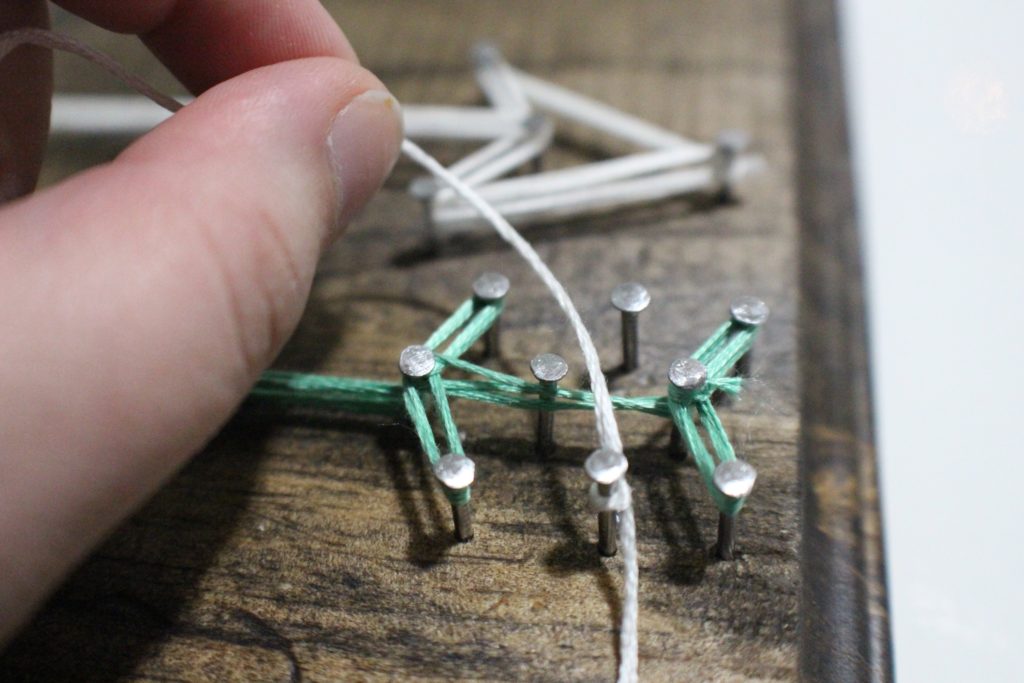
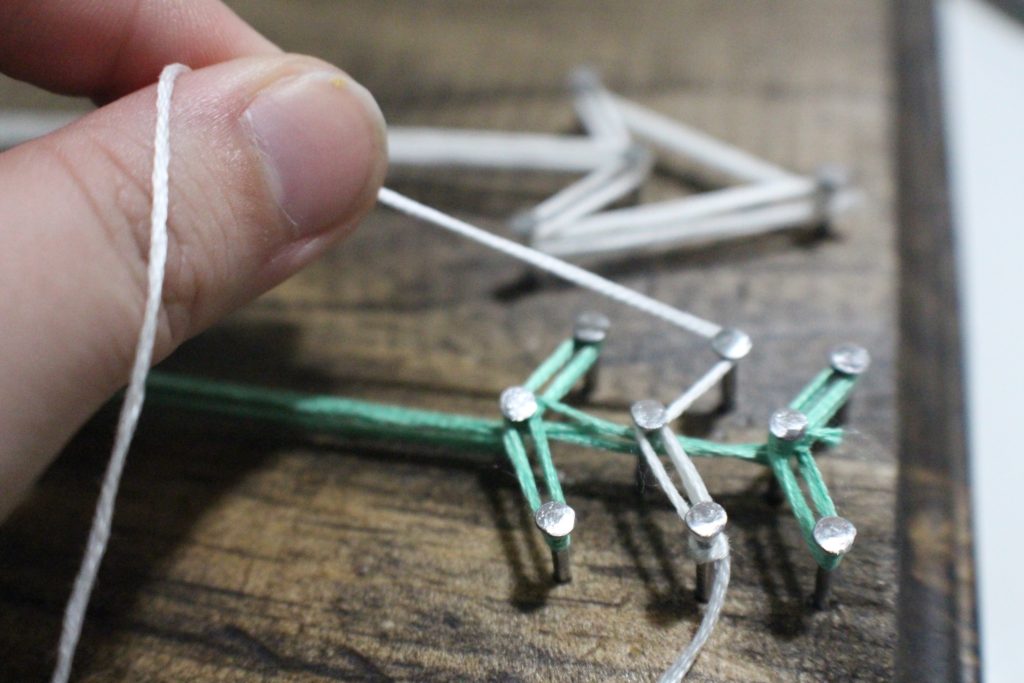
Next, you just have fun looping the string around the nails. I made sure that I made each pass twice, so for each “line” segment of the arrow there are four strings. You can see the steps I took for one segment on the pictures below.
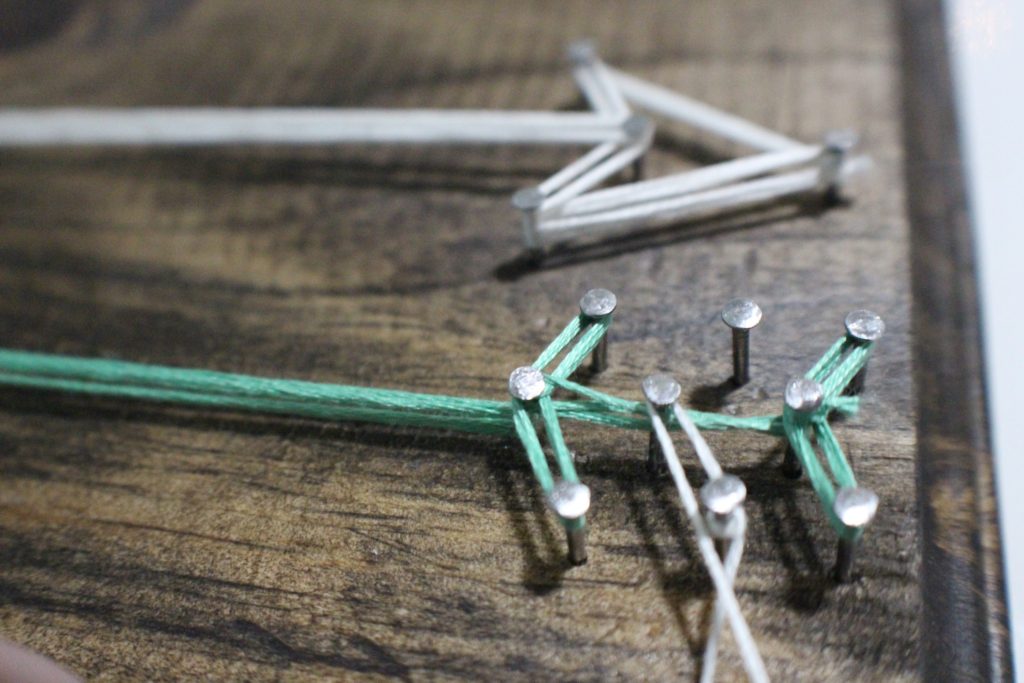
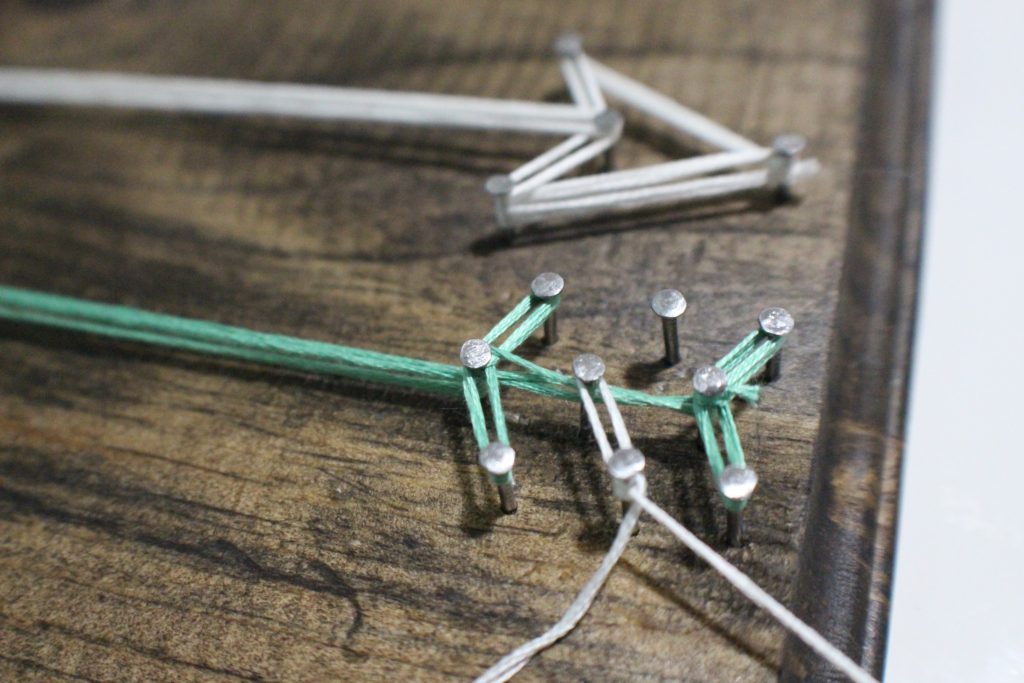
Before you move to a different segment of the arrow, you want to do a double loop around the intersection nail to secure it.
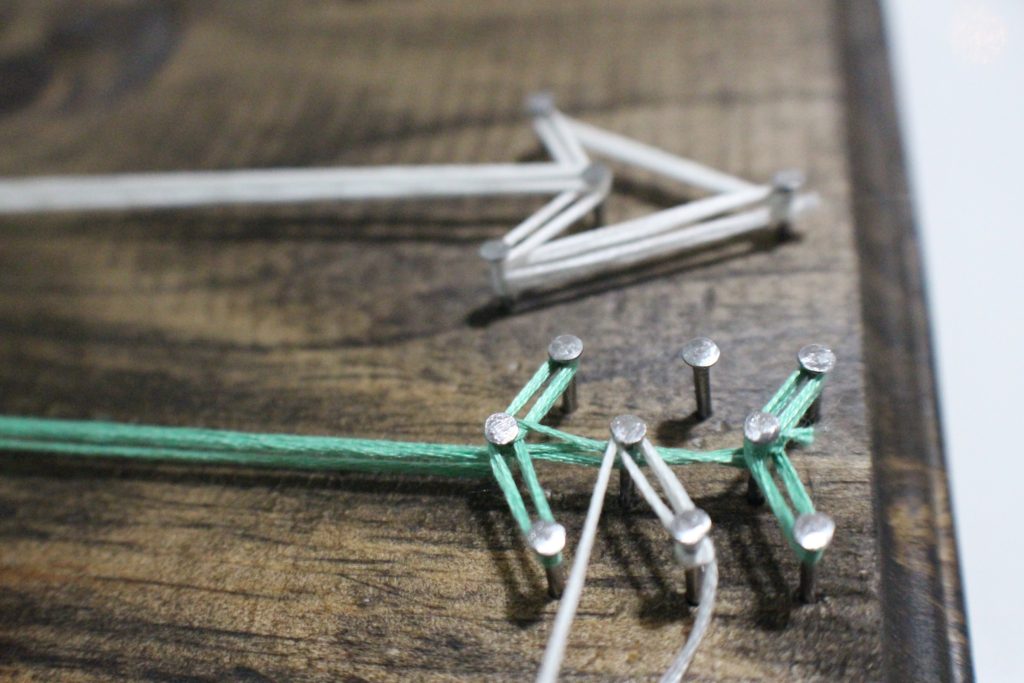
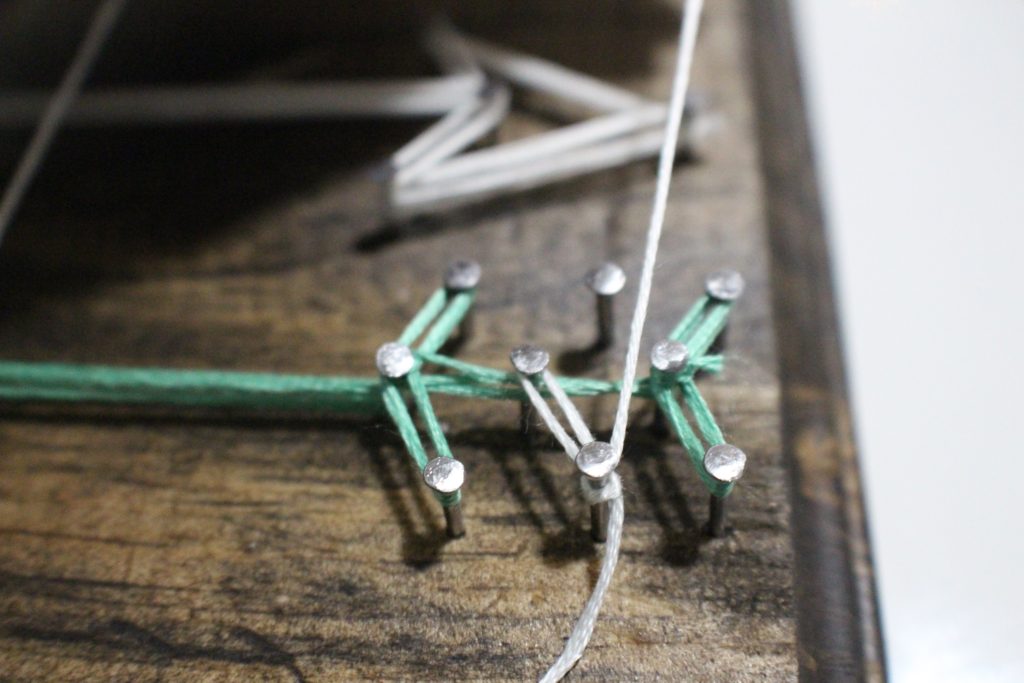
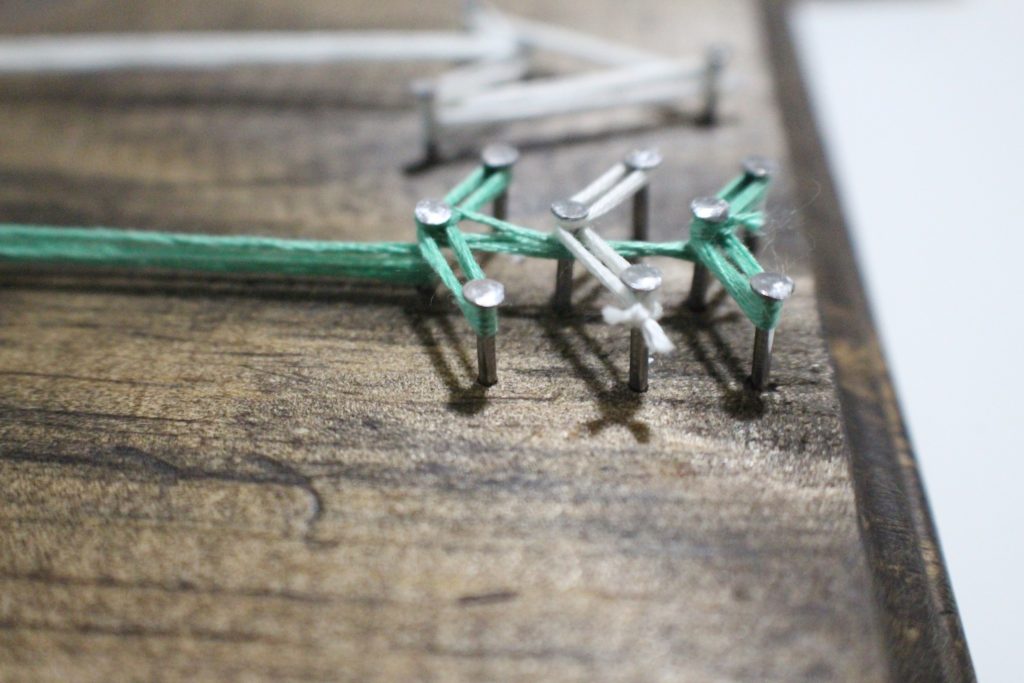
Then proceed to next segment and repeat the same process.
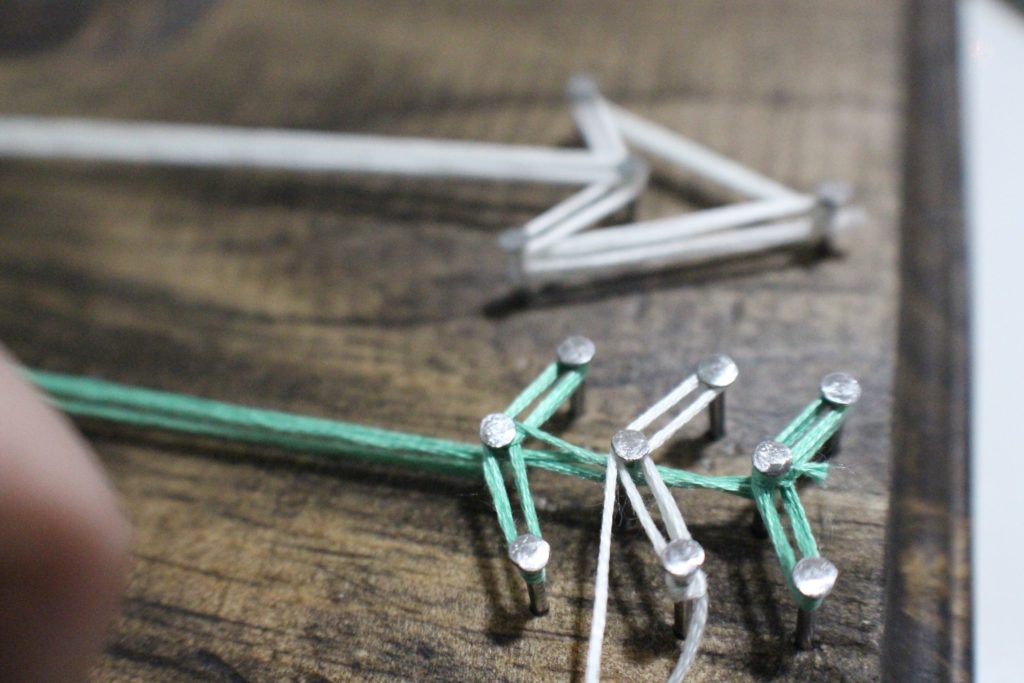
Continue looping thread for each segment of each arrow until you are done. When you are finished with one thread color, take your loop to a corner nail and make a double knot to secure the end. Then cut the remnant thread.
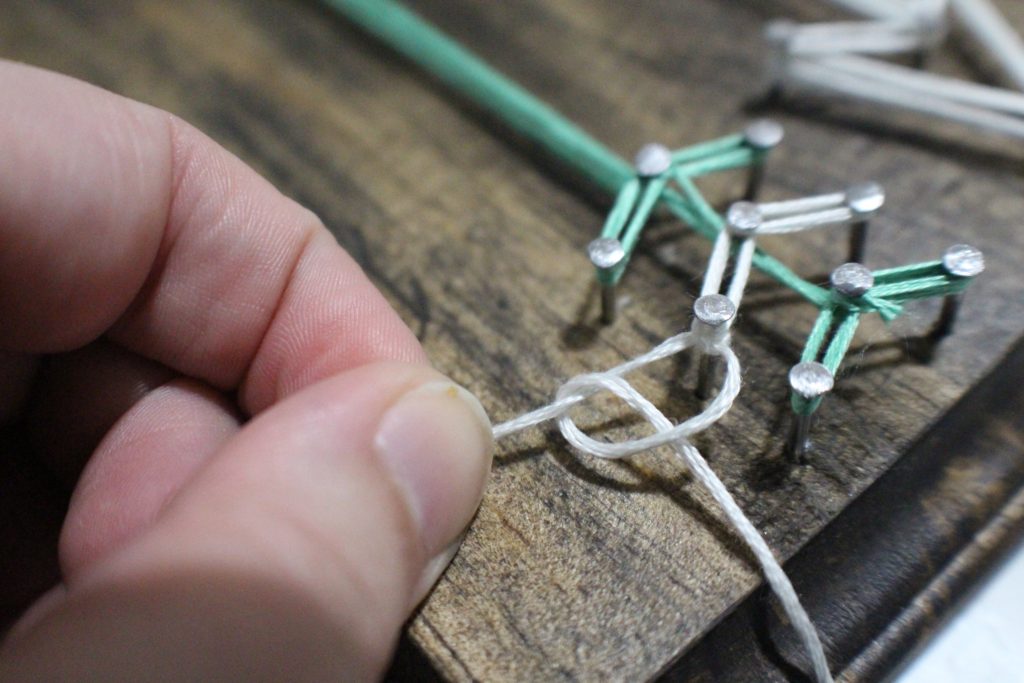
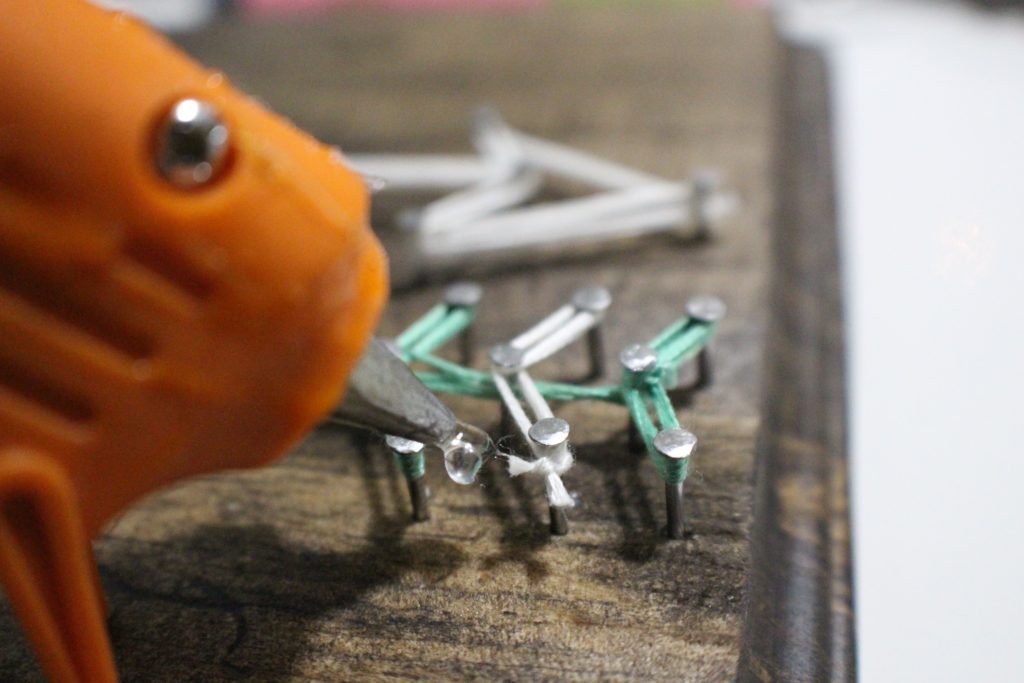
We are going to put a dot of hot glue at the end of each knots to ensure that it doesn’t come apart.
When you are done with your three arrows, your wall string art should look something like this.
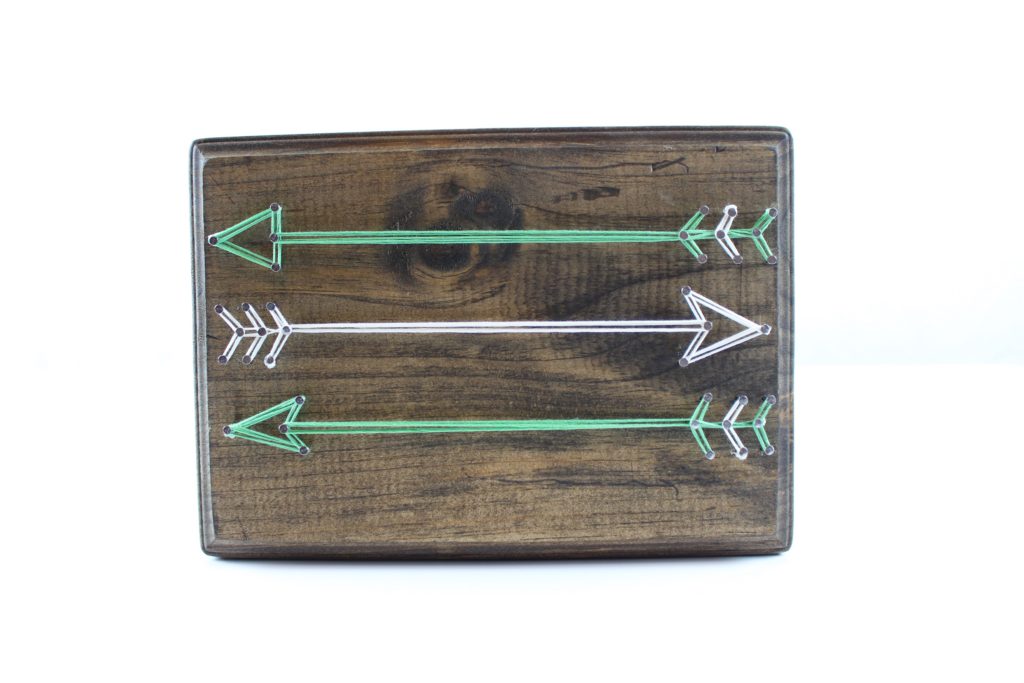
I decided that I wanted to add a quote to mine, so I painted “remember to follow your dreams” to my wall art piece. I used a custom stencil I created with my Silhouette Cameo and white acrylic paint. What do you think?


Try to make your own version of string art and post your pics on the comment session. I would love to see your creations.
-M